Flashlight
Overview

In this tutorial you will learn how to build a 3D model of a flashlight using the revolve function, layer options, changing materials and colours and finally how to render the object.

The bounding box

Start by drawing a rectangle. The start coordinates will be (0,-25,0). Length will be 200 and width is 50. Now draw a line starting at (150,-25,0) going to (150,25,0). The rectangle acts as a bounding box, and the line is a guideline for drawing curves in the coming steps. Lock the first layer that you have drawn the rectangle in. Then switch to the second layer to proceed.

Hint: Use the panels tab to access the layers options like locking or visibility.

Instructions
Marek Runde

Duration
120 min

Level
Basic

→ DOWNLOAD PDF


The Body

With the aid of your guidelines, use the control point curve to draw the outline of the flashlight body. Make sure that the start and end point of your curve is on the guideline you drew through your bounding box. The shape you draw does not have to be identical to the one above.

Hint: Activate and deactivate the snaps as you create the curve. Near, End and grid snap will help you a lot. 

Switch to another layer to create the lens. Use the control point curve command to draw the shape of the lens. The start and end of the lens curve should also snap to the mid-line you drew earlier.

Type in revolve in the command prompt. Now select the curve you created for the body and press enter. Draw the revolve axis that you want to revolve around. Start angle will be set to 0 and the revolution angle will be set to full circle. Press enter to finish the revolve command.

The lens
The Knob
Layer names

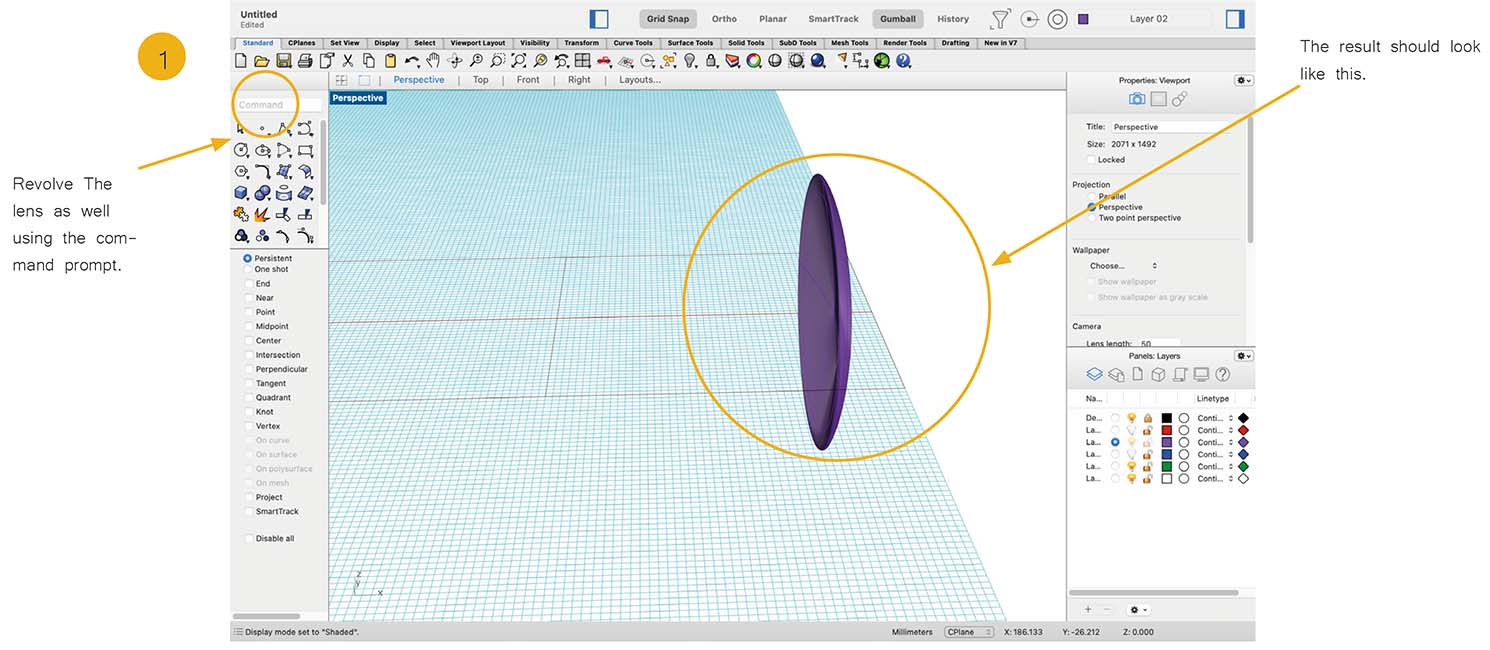
Do the same thing as with the body with the lens.

Hint: You can switch off the Visibility of the other layers by clicking the light bulb in the panels tab. This lets you see the lens a little better.

The Flashlight needs a button to be switched on. Go to the top view port. Activate intersection or near and end snap. Then activate another layer and type in sphere in the command prompt. Pick a place for the button and then define its size.

Hint: Using many layers helps keeping order and lets you define different properties to them like material or color.

You can rename every layer to your liking. Now that we set the proper names to all the layers we’ve created, we can start working on assigning materials and colours to the individual elements of your flashlight.

Layer properties

You can also change the material by clicking in the little white circle in the panels display. Here, the material of the body was changed to metal and the color to a silver gray.

Now lets assign a glass material to the lens, the colour chosen was light blue. The only thing missing is the little button on top of the flashlight. Choose any color and material you like and check out other settings as well.

Render

Set up your perspective viewport as if you are looking through a camera lens. The position you set the object to is the position in which it will render. After that, you can click “render” and rhino will render an image of your model with the set parameters.

Several moments later, depending on your computing power, you will have the rendered image of your model. Explore further settings and adjustments in your render window.

Instructions
Marek Runde

Duration
120 min

Level
Basic


Privacy Settings
We use cookies to enhance your experience while using our website. If you are using our Services via a browser you can restrict, block or remove cookies through your web browser settings. We also use content and scripts from third parties that may use tracking technologies. You can selectively provide your consent below to allow such third party embeds. For complete information about the cookies we use, data we collect and how we process them, please check our Privacy Policy
Youtube
Consent to display content from - Youtube
Vimeo
Consent to display content from - Vimeo
Google Maps
Consent to display content from - Google

info(at)materiability.com