Contents
1. Introduction
2. Sketching
3. Libraries
4. Your First Program
5. The Coordinate System
6. Functions
7. Basic Shapes
8. Comments
9. Drawing Order
10. Variables
11. While Loop
12. For Loop
13. Color
14. Structure
15. Conditionals
16. Random
17. Examples
17.1 Circle Grid
17.2 Square Grid
17.3 Birds Nest
17.4 Network
18. Arrays
19. Examples Part 2
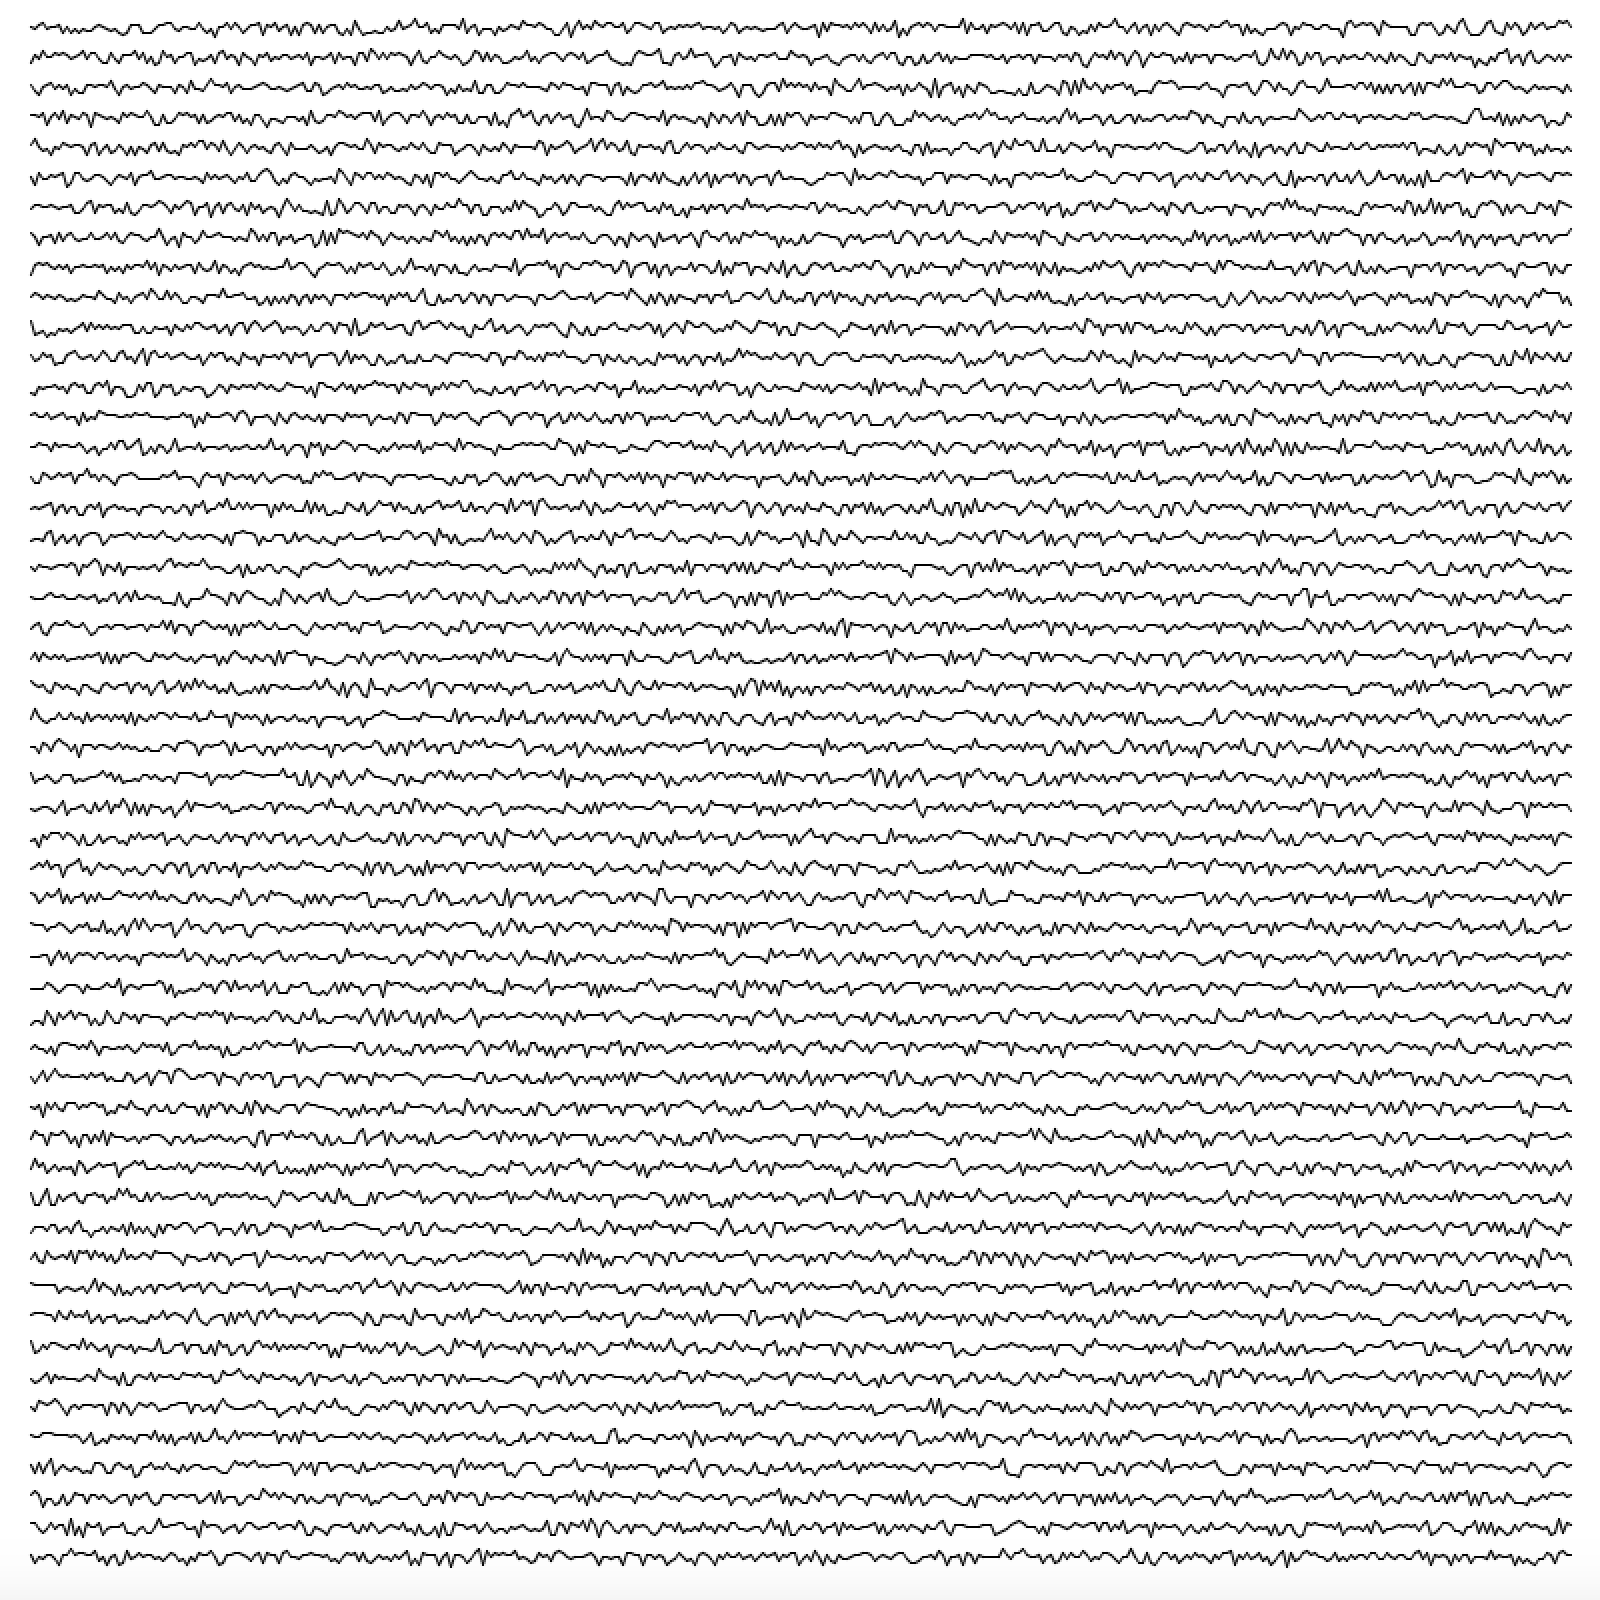
19.1 Wiggle Lines
19.2 Noise Spiral
19.3 Polygon Scribble
20. Export
Instructions
Manuel Kretzer
Duration
Several hours
Level
Advanced
Category
The following information is a combination of text excerpts and illustrations from “Learning Processing, Second Edition: A Beginner’s Guide to Programming Images, Animation, and Interaction” by Daniel Shiffman (2015), “Generative Art” by Matt Pearson (2011), and “Make: Getting Started with Processing” by Casey Reas and Ben Fry (2010) as well as online sources such as tutorials provided on the Processing website (https://processing.org/ tutorials/). All codes in this tutorial are also saved in ‘tutorial-04_processing – codes’.
1. Introduction
Processing is a simple programming environment that was created to make it easier to develop visually oriented applications with an emphasis on animation and providing users with instant feedback through interaction. The developers wanted a means to “sketch” ideas in code. As its capabilities have expanded over the past decade, Processing has come to be used for more advanced production-level work in addition to its sketching role. Originally built as a domain-specific extension to Java targeted towards artists and designers, Processing has evolved into a full-blown design and prototyping tool used for large-scale installation work, motion graphics, and complex data visualization. Examples of Processing usages can be found on https://processing.org/exhibition The latest version of Processing can be downloaded at http://processing.org/download
2. Sketching
A Processing program is called a sketch. The idea is to make Java-style programming feel more like scripting, and adopt the process of scripting to quickly write code. Sketches are stored in the sketchbook, a folder that’s used as the default location for saving all of your projects. Sketches that are stored in the sketchbook can be accessed from File → Sketchbook. Alternatively, File → Open… can be used to open a sketch from elsewhere on the system.
The large area is the Text Editor, and there’s a row of buttons across the top; this is the tool-bar. Below the editor is the Console, which can be used for messages and more technical details. The small square is the Display Window, the graphical output of the Sketch.
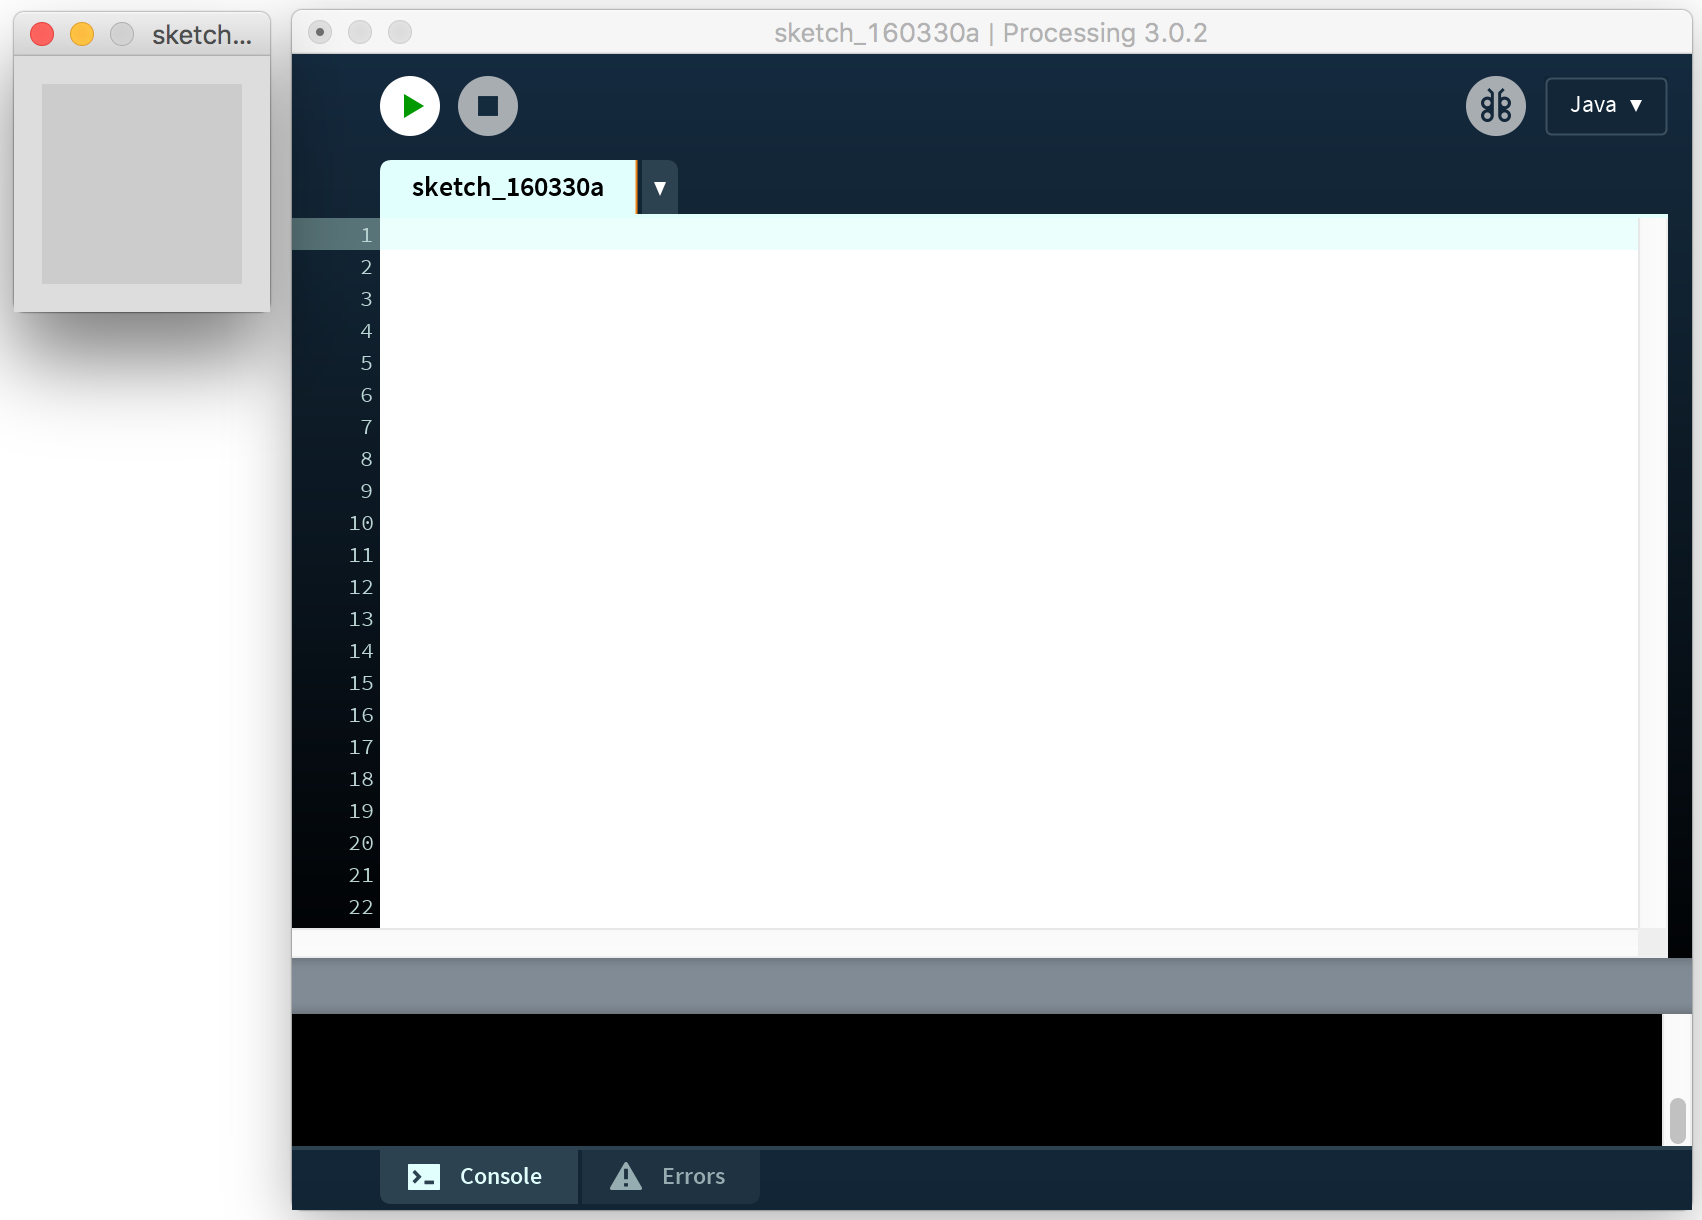
The Processing Development Environment
3. Libraries
The core functionality of Processing should be sufficient in the beginning. Yet, if you need to do something that’s not available in Processing, you can use a library that adds the functionality you need. Libraries can be installed by opening Sketch → Import Library → Add Library.
The large area is the Text Editor, and there’s a row of buttons across the top; this is the tool-bar. Below the editor is the Console, which can be used for messages and more technical details. The small square is the Display Window, the graphical output of the Sketch.
4. Your First Program
In the editor, type the following:
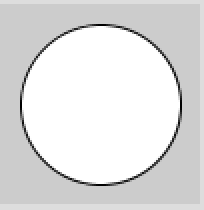
ellipse(50, 50, 80, 80);
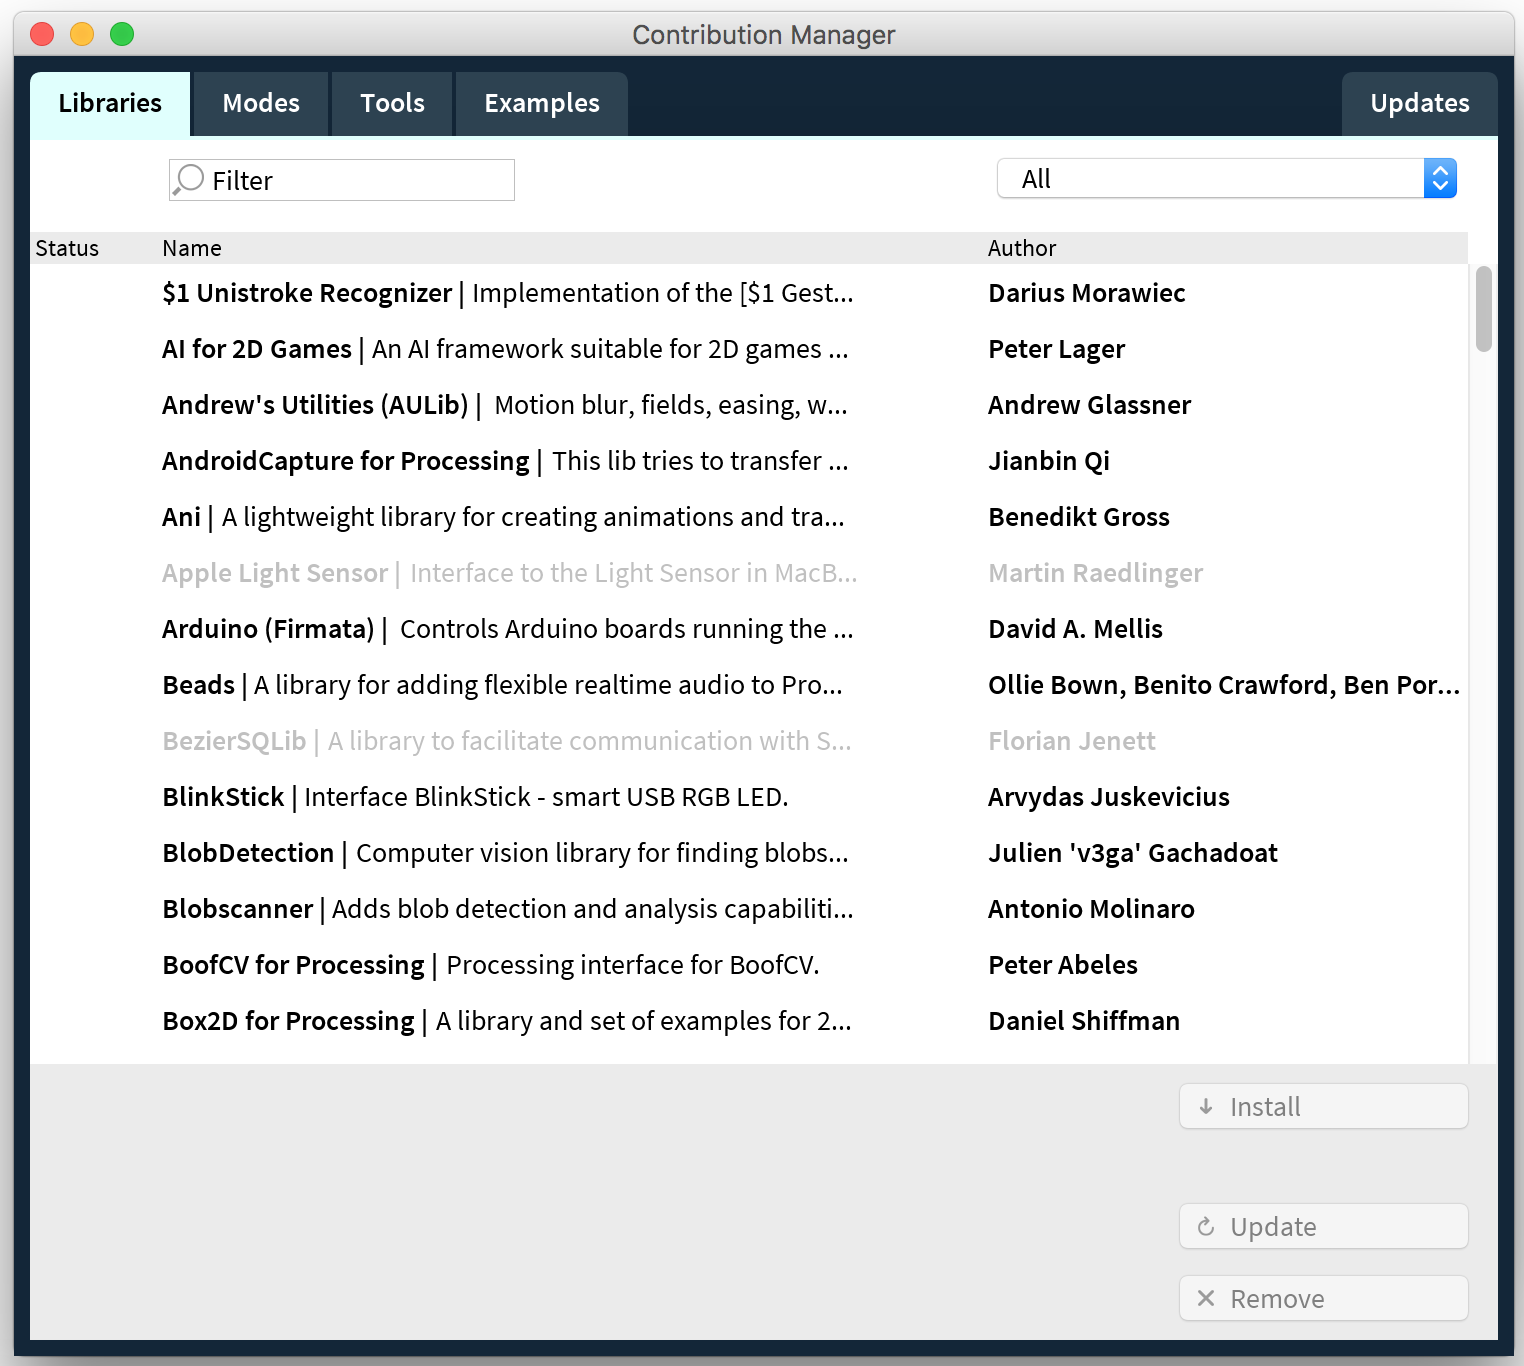
The Processing Contribution Manager
This line of code means “draw an ellipse, with the center 50 pixels over from the left and 50 pixels down from the top, with a width and height of 80 pixels.” Click the Run button in the tool-bar or Sketch → Run. If you’ve typed everything correctly, you’ll see the ellipse image above. If you didn’t type it correctly, the Console Area will turn red and complain about an error. If this happens, make sure that you’ve copied the example code exactly: the numbers should be contained within parentheses and have commas between each of them, and the line should end with a semicolon. One of the most difficult things about getting started with programming is that you have to be very specific about the syntax. The Processing software isn’t always smart enough to know what you mean, and can be quite fussy about the placement of punctuation. You’ll get used to it with a little practice.
5. The Coordinate System
Processing uses the upper-left corner for the origin of the window. CAD applications usually prefer a different point for the origin of their drawing surface, like Rhino 3D, which uses the bottom-left corner as (0,0). The size() function sets the dimensions of the sketch window. The default is size(100,100). The first parameter is used to set the value of the system variable width, the second parameter is used to set the value of the system variable height. So, if the display window is 100×100 pixels, the upper-left is (0, 0), the center is at (50, 50), and the lower-right is (99, 99) or (width-1, height-1). If you now want to draw a point at the origin, you’ll use:
point(0, 0);
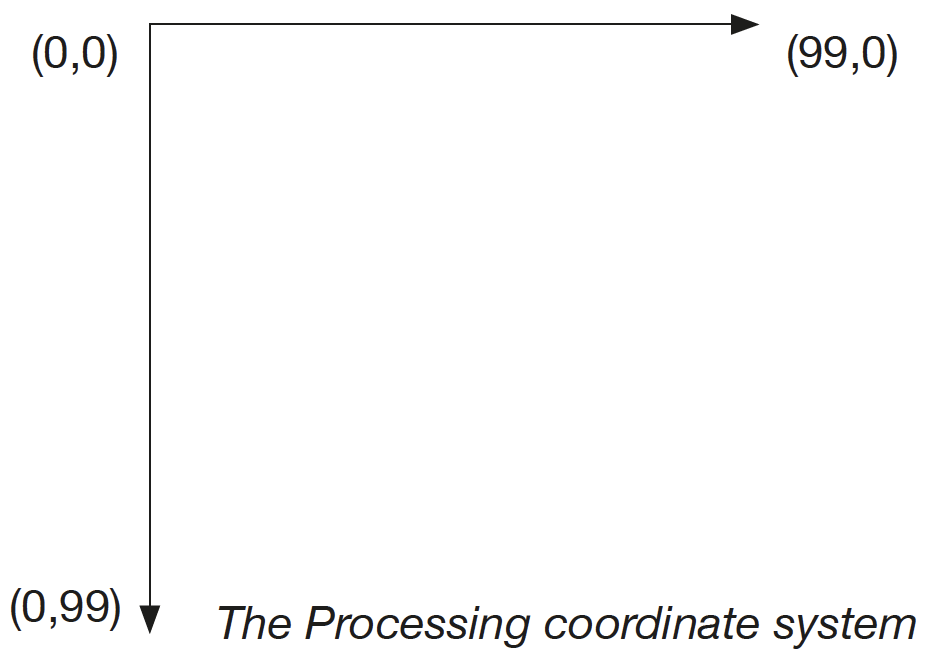
This line of code will fill the first pixel on the first row. As we start counting at 0, the last pixel on that row would be 99, or width-1. The same is true for the height. The following code will draw a red point with a thickness of five pixel at (0,0) and another one at (99,99)
strokeWeight(5);
stroke(255,0,0);
point(0, 0);
point(width-1, height-1);

6. Functions
Functions are the basic building blocks of a Processing program. The behavior of a function is defined by its parameters, a set of arguments enclosed in parentheses. Each function call must always end with a semicolon. Processing will execute a sequence of functions one by one and finish by displaying the drawn result in a window. An overview of all functions can be found in the Processing reference (https://processing.org/reference/). The usage of a certain function is explained by highlighting a function and right-clicking or through Help → Find in Reference.
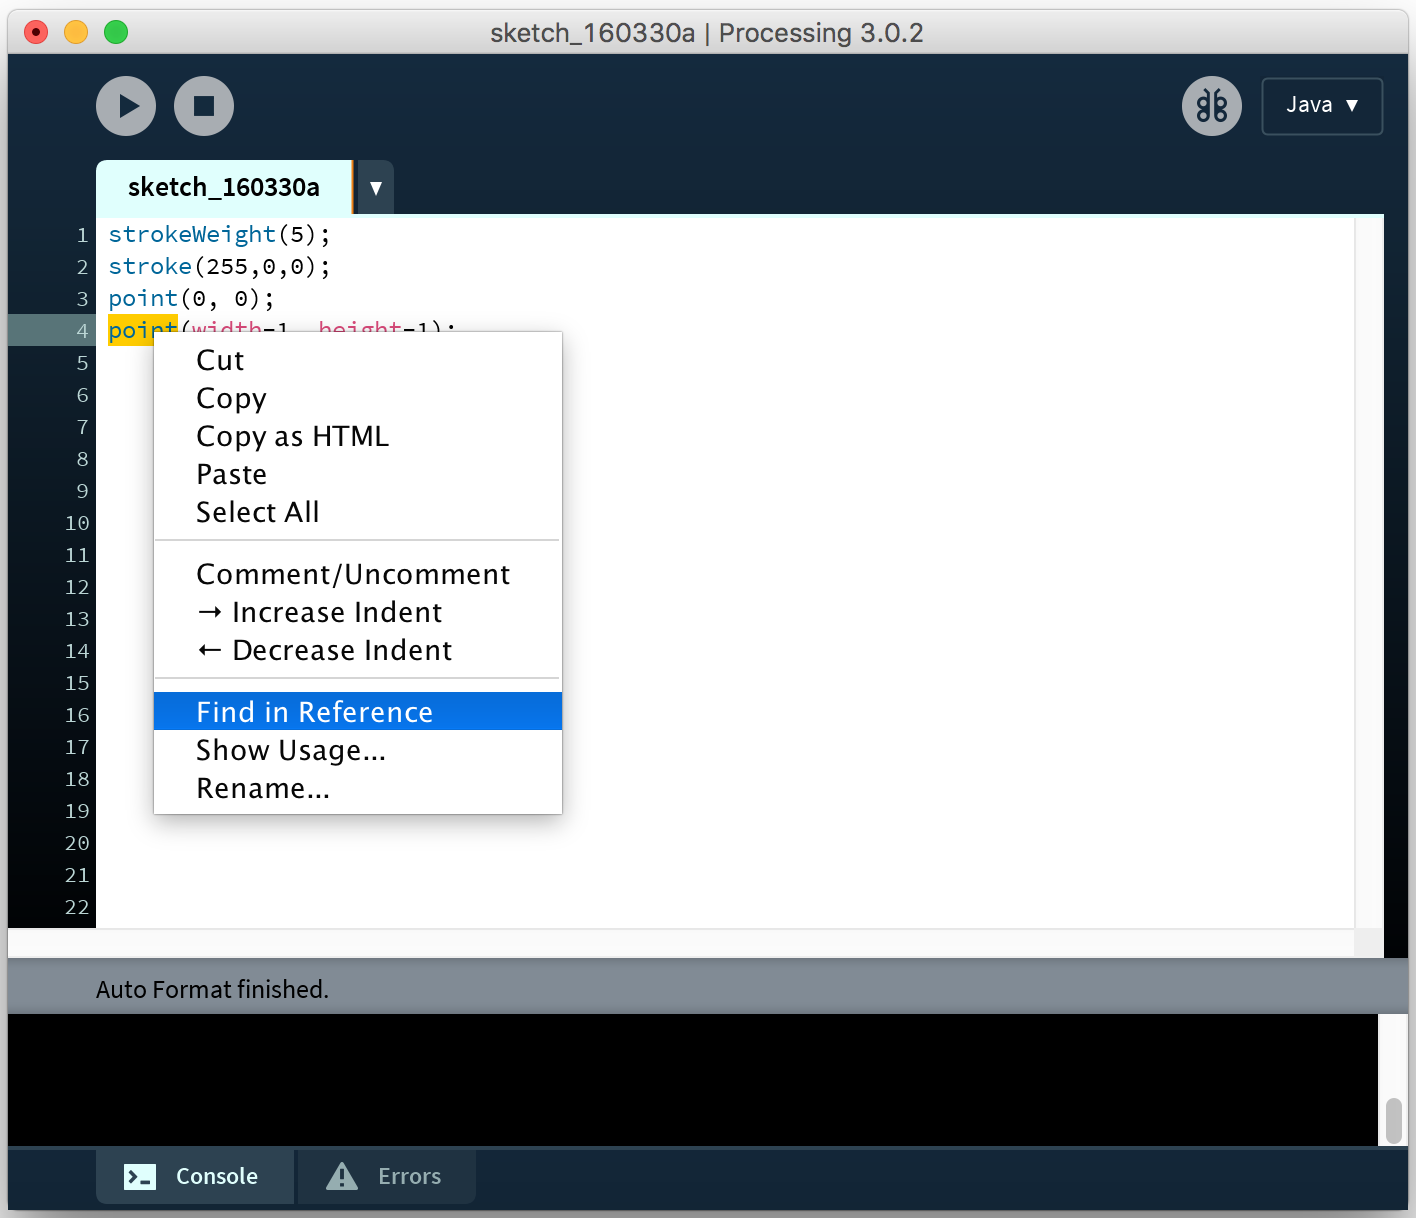
Finding a function in reference
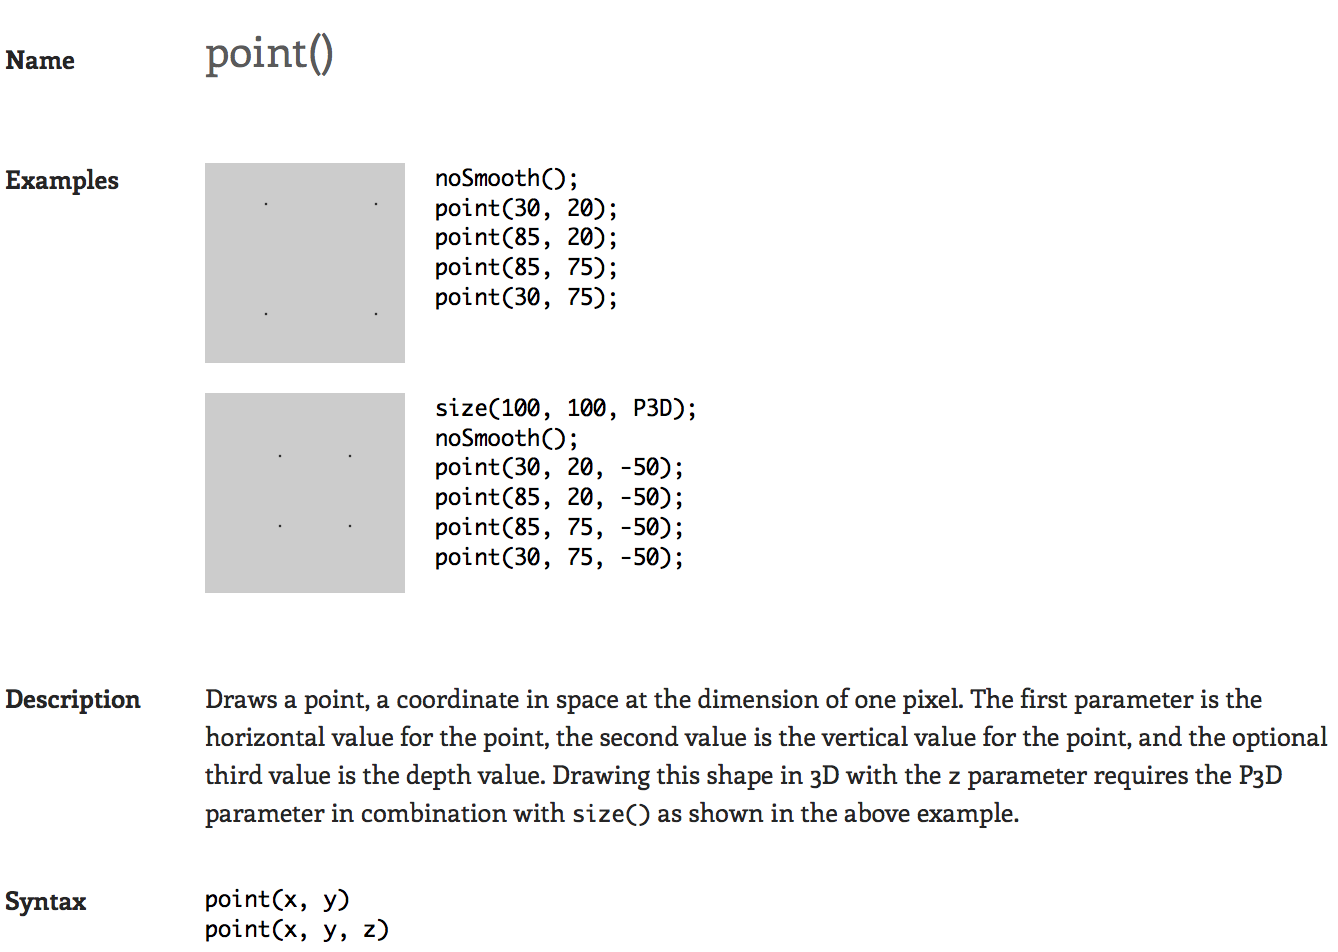
Description of a certain function as found in the reference
7. Basic Shapes
Processing includes a group of functions to draw basic shapes. Simple shapes like lines can be combined to create more complex forms like a leaf or a face. To draw a single line, we need four parameters: two for the starting location and two for the end.
8. Comments
Comments are parts of the program that are ignored when the program is run. They are useful for making notes for yourself that explain what’s happening in the code. If others are reading your code, comments are especially important to help them understand your thought process. Comments are also useful for trying things in your code without loosing the original attempt.
// This is a comment on one line
/* This is a comment that spans several lines of code */
9. Drawing Order
When a program runs, the computer starts at the top and reads each line of code until it reaches the last line and then stops. If you want a shape to be drawn on top of all other shapes, it needs to follow the others in the code.
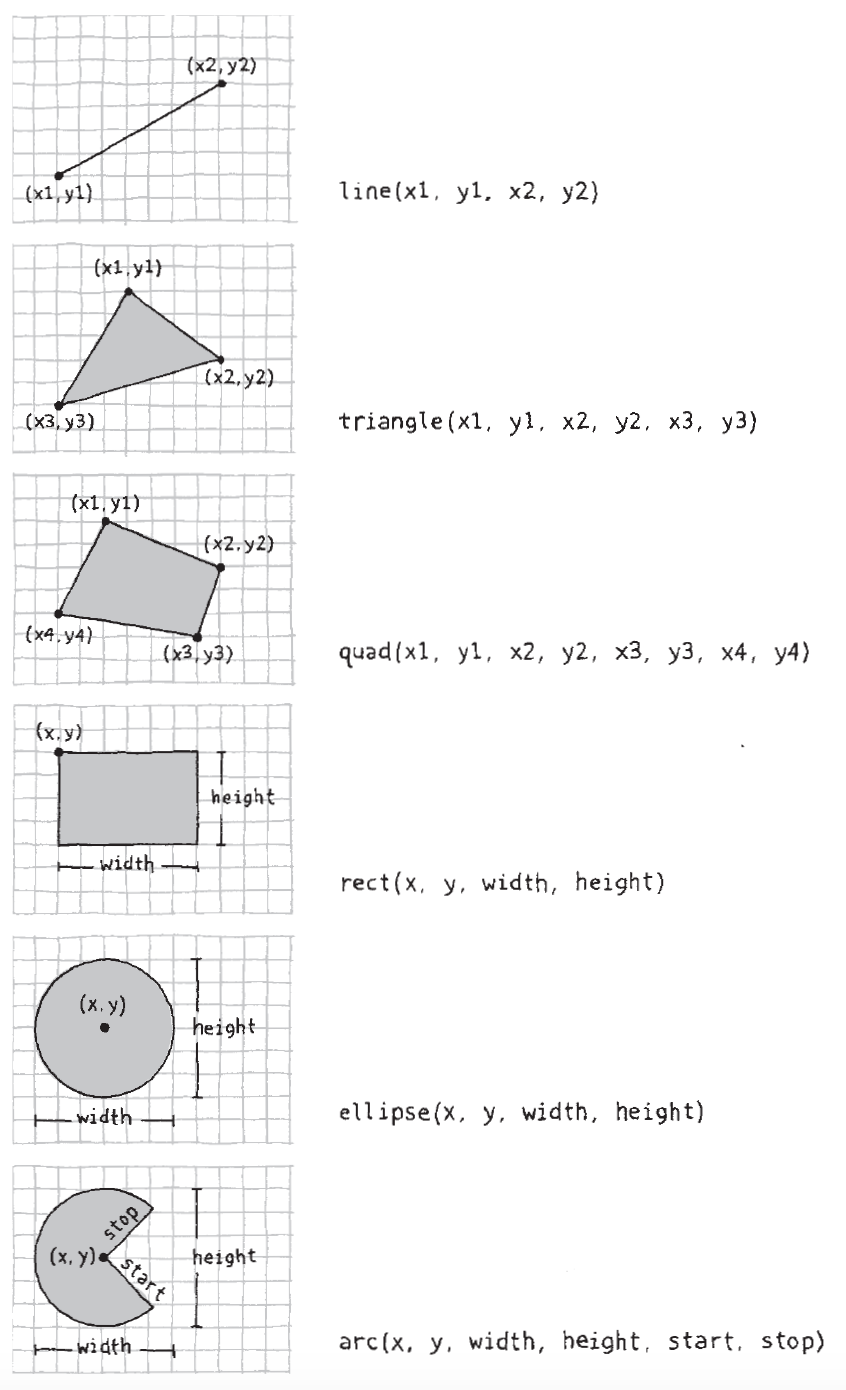
Different shapes in Processing and their parameters
The most common Processing data types:
| Data Type | Example of Usage | Usage Description |
| char | char varName =’a’; | A letter or Unicode symbol, such as a or #. Note the single quotation marks used around the symbol. |
| int | int varName = 12; | An integer (a whole number). Can be positive or negative. |
| float | float varName = 1.2345; | A floating-point number. A number that may have a decimal point. |
| boolean | boolean varName = true; | A true or false value. Used for logical operations because it can only ever be one of two states. |
| String | String varName = “hello”; | A list of chars, such as a sentence. Note the capital S on String, signifying that this is a composite type (a collection of chars). |
11. While Loop
As you write more programs, you’ll notice that patterns occur when lines of code are repeated, but with slight variations. A code structure called a loop makes it possible to run a line of code more than once to condense this type of repetition into fewer lines. This makes your programs more modular and easier to change.
int number = 99;
while (number > 0) {
println(number);
number--;
}
println(“zero”);
This outputs the value of ‘number’ to the console window 99 times. The while command checks a condition and, if the condition is met, executes the code inside the braces; it then loops back up to the top of the block. The execution continues to the final line only after the condition is no longer met (in this case, when ‘number’ is 0). Note that if you don’t include the ‘number–’ line inside the loop, which subtracts 1 from the number every time it loops, the condition will never be met and the loop will go on forever.
12. For Loop
The for loop is used when you want to iterate through a set number of steps, rather than just wait for a condition to be satisfied. The syntax is as follows:
for (init; test; update) {
code to be executed
}
The code between the curly brackets { } is called a block. This is the code that will be repeated on each iteration of the loop. Inside the parentheses are three statements, separated by semicolons, that work together to control how many times the code inside is run. From left to right, these statements are referred to as the initialization (init), the test, and the update. The ‘init’ typically declares a new variable to use within the for loop and assigns a value. The variable name ‘i’ is frequently used. The ‘test’ evaluates the value of this variable, and the ‘update’ changes it’s value. The test statement is always a relational expression that compares two values with a relational operator. The most common relational operators are:
> Greater than
< Less than
>= Greater than or equal to
<= Less than or equal to
== Equal to
!= Not equal to
The relational expression always evaluates to true or false. When it’s true, the code inside the block is run, when it’s false, the code inside the block is not run and the for loop ends (sketch_04_01).
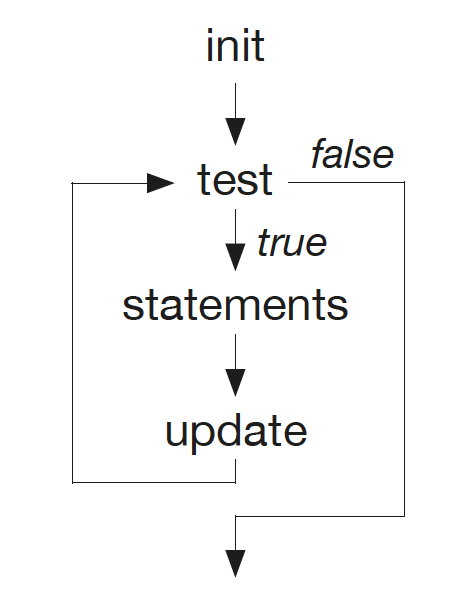
Flow diagram of a for loop
size(500, 300);
background(155);
strokeWeight(3);
for (int h = 10; h <= (height - 15); h+=10) {
  stroke(0, 255-h);
  line(10, h, width - 10, h);
  stroke(255, h);
  line(10, h+3, width - 10, h+3);
}
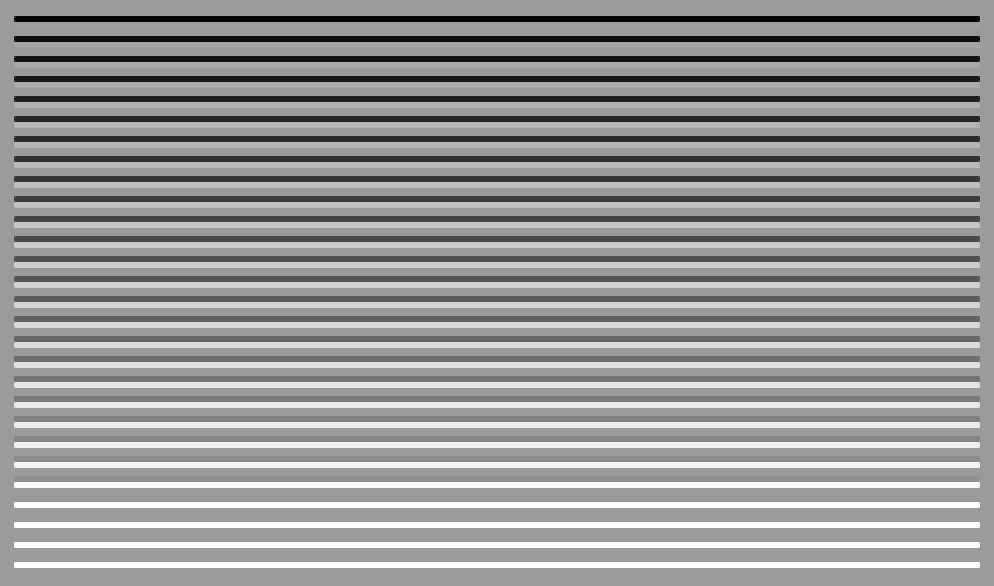
The initial state of the for loop sets a variable h to 10. The code in the loop executes until h <= (height-15) (the end condition). Every time the loop is executed, the value of h increases by 10, according to the step you’ve defined (h += 10). This means the code inside the parentheses of the for loop will execute 28 times, with h set to 10, 20, 30 … 270, 280. Knowing that the h variable follows this pattern, you can use it in multiple ways. The lines you’re drawing are in 10-pixel steps down the canvas, because you use h for the y value. But the alpha transparency of the lines also varies as h varies: the black line gets lighter, and the white line gets darker.
13. Color
To change color in your shapes use the background(), fill(), and stroke() functions. The values of the parameters are in the range of 0 to 255, where 255 is white, 128 is medium gray, and 0 is black. To move beyond gray-scale values, you use three parameters to specify the red, green, and blue components of a color. They also range from 0 to 255. Using RGB color isn’t very intuitive, so to choose colors, you can use Tools → Color Selector. By adding an optional fourth parameter to fill() or stroke(), you can control the transparency. This fourth parameter is known as the alpha value, and also uses the range 0 to 255 to set the amount of transparency. The value 0 defines the color as entirely transparent (it won’t display), the value 255 is entirely opaque, and the values between these extremes cause the colors to mix on screen (sketch_04_02).
size(255, 255);
for (int y=0; y<height; y+=1) {
  for (int x=0; x<width; x+=1) {
    stroke(x, y, 122);
    point(x, y);
  }
}
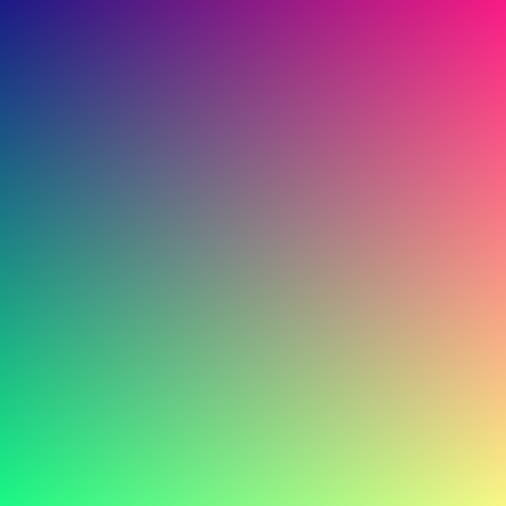
When one for loop is embedded inside another, the number of repetitions is multiplied. For each line in y-direction (y < height) the code iterates through every pixel in x-direction (x < width) and draws a point at the respective location with a red and green color value corresponding to x and y.
14. Structure: setup() and draw()
In Processing scripts can be structured into two distinct parts, so-called function blocks: setup() and draw(). A function block is a way of chunking a group of commands together. The code inside the setup() function block is called once when the program launches, so it should contain all your initialization code—setting the canvas size, setting the background color, initializing variables, and so on. The code you write inside draw() is then called repeatedly, triggered on every frame. You can set the speed with which draw() is called by using the ‘frameRate()’ function. If you give it a number (12, 24, 25, and 30 are typical), it will attempt to maintain that rate, calling draw()regularly. Otherwise, it will perform the frame loop as quickly as the machine can handle (sketch_04_03).
int diam = 10;
float centX, centY;
void setup() {
size(500, 300);
frameRate(24);
smooth();
background(180);
centX = width/2;
centY = height/2;
stroke(0);
strokeWeight(5);
fill(255, 50);
}
void draw() {
if (diam <= 400) {
background(180);
ellipse(centX, centY, diam, diam);
diam += 10;
}
}
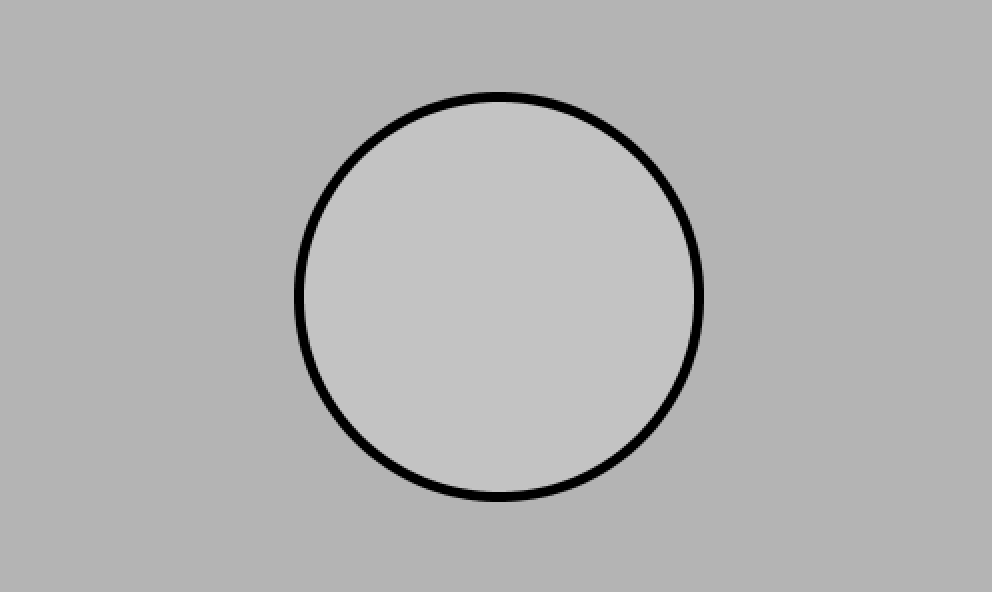
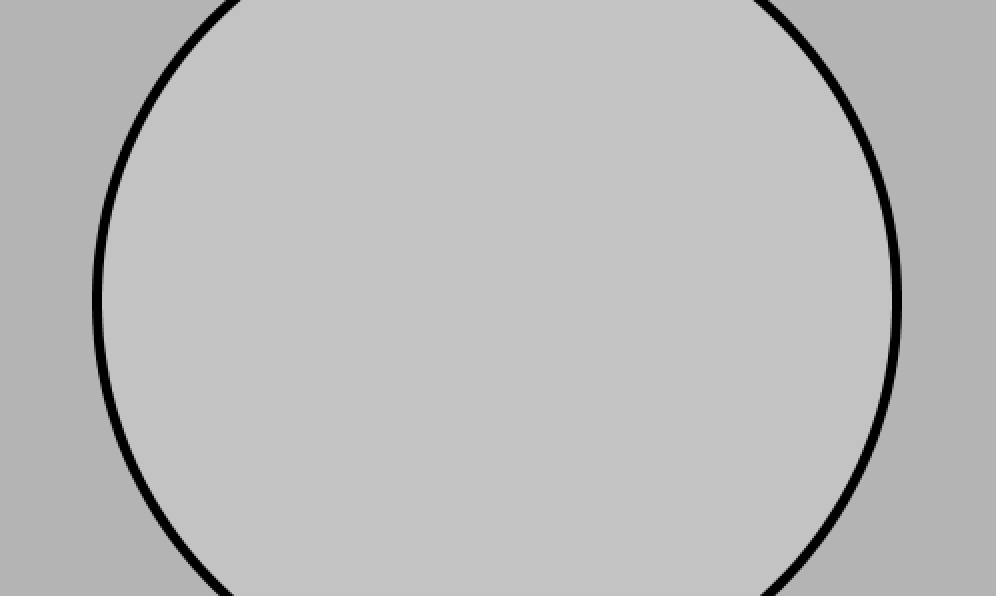
When you run this you’ll see a circle grow, stopping when the diameter reaches 400 pixels. The diameter and the center points are kept in variables, with the center points calculated in ‘setup()’. The frame loop then checks that the diameter is smaller than 400, redraws the background, draws the circle, and increases the diameter by 10 for the next time it goes around the loop. The effect is that it draws a circle of diameter 10, 20, 30, and so on until the diam variable gets to 400.
Notice that if you create a variable inside of setup(), you can’t use it inside of ‘draw()’ and vice versa. A variable within a function block is only available within that block (“locally”). It’s good practice to do this if a variable is only needed within a single function. Yet in order to make variables available everywhere, you need to place them somewhere else. Such variables are called global variables, because they can be used anywhere (“globally”) in the program. This is clearer when we list the order in which the code is run:
- Variables declared outside of ‘setup()’ and ‘draw()’ are created.
- Code inside ‘setup()’ is run once.
- Code inside ‘draw()’ is run continuously.
15. Conditionals
A conditional checks that a condition has been met before executing the code inside the block marked by the braces that follow it. In this case, the conditional asks whether the value of diam is less than or equal to 400. If it is, the code in the block executes. If not, the code in the block is skipped:
// check a condition
if (diam <= 400) {
  // execute code between the braces
  // if condition is met
}
You can also use an else clause to provide a block of code to be executed if the condition isn’t met:
if (diam <= 400) {
  // execute this code if diam <= 400
} else {
  // execute this code if diam > 400
}
If you imagine the flow of execution as a trickle of water running down the script, by setting a conditional you’re effectively creating different channels for the stream to follow. With an if … else clause, the stream can go one of two ways, either through the block or around. In addition to operators as described in ‘11. For Loop’ you can also use logic operators to group conditions:
|| logical OR
&& logical AND
! logical NOT
16. Random
Unlike the smooth, linear motion common to computer graphics, motion in the physical world is usually idiosyncratic. We can simulate the unpredictable qualities of the world by generating random numbers. The ‘random()’ function calculates these values; we can set a range to tune the amount of disarray in a program. The following short example prints random values to the console, with the range limited by the position of the mouse. The ‘random()’ function always returns a floating-point value, so be sure the variable on the left side of the assignment operator (=) is a float as it is here (sketch_04_04):
void draw() {
  float r = random(0, mouseX);
  println(r);
}
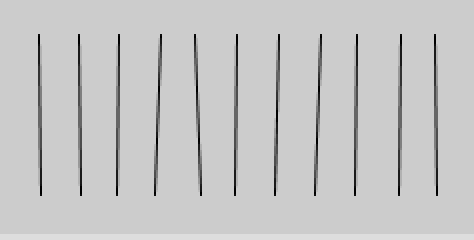
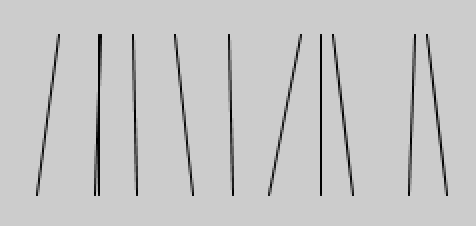
The following example uses the values from ‘random()’ to change the position of lines on screen. When the mouse is at the left of the screen, the change is small; as it moves to the right, the values from ‘random()’ increase and the movement becomes more exaggerated. Because the ‘random()’ function is inside the for loop, a new random value is calculated for each point of every line (sketch_04_05):
void setup() {
  size(240, 120);
  smooth();
}
void draw() {
background(204);
for (int x = 20; x < width; x += 20) {
float mx = mouseX / 10;
float offsetA = random(-mx, mx);
float offsetB = random(-mx, mx);
line(x + offsetA, 20, x – offsetB, 100);
}
}
17. Examples
The following are a number of short examples during which the creation of random values plays a critical role.
17.1 Circle Grid (sketch_04_06)
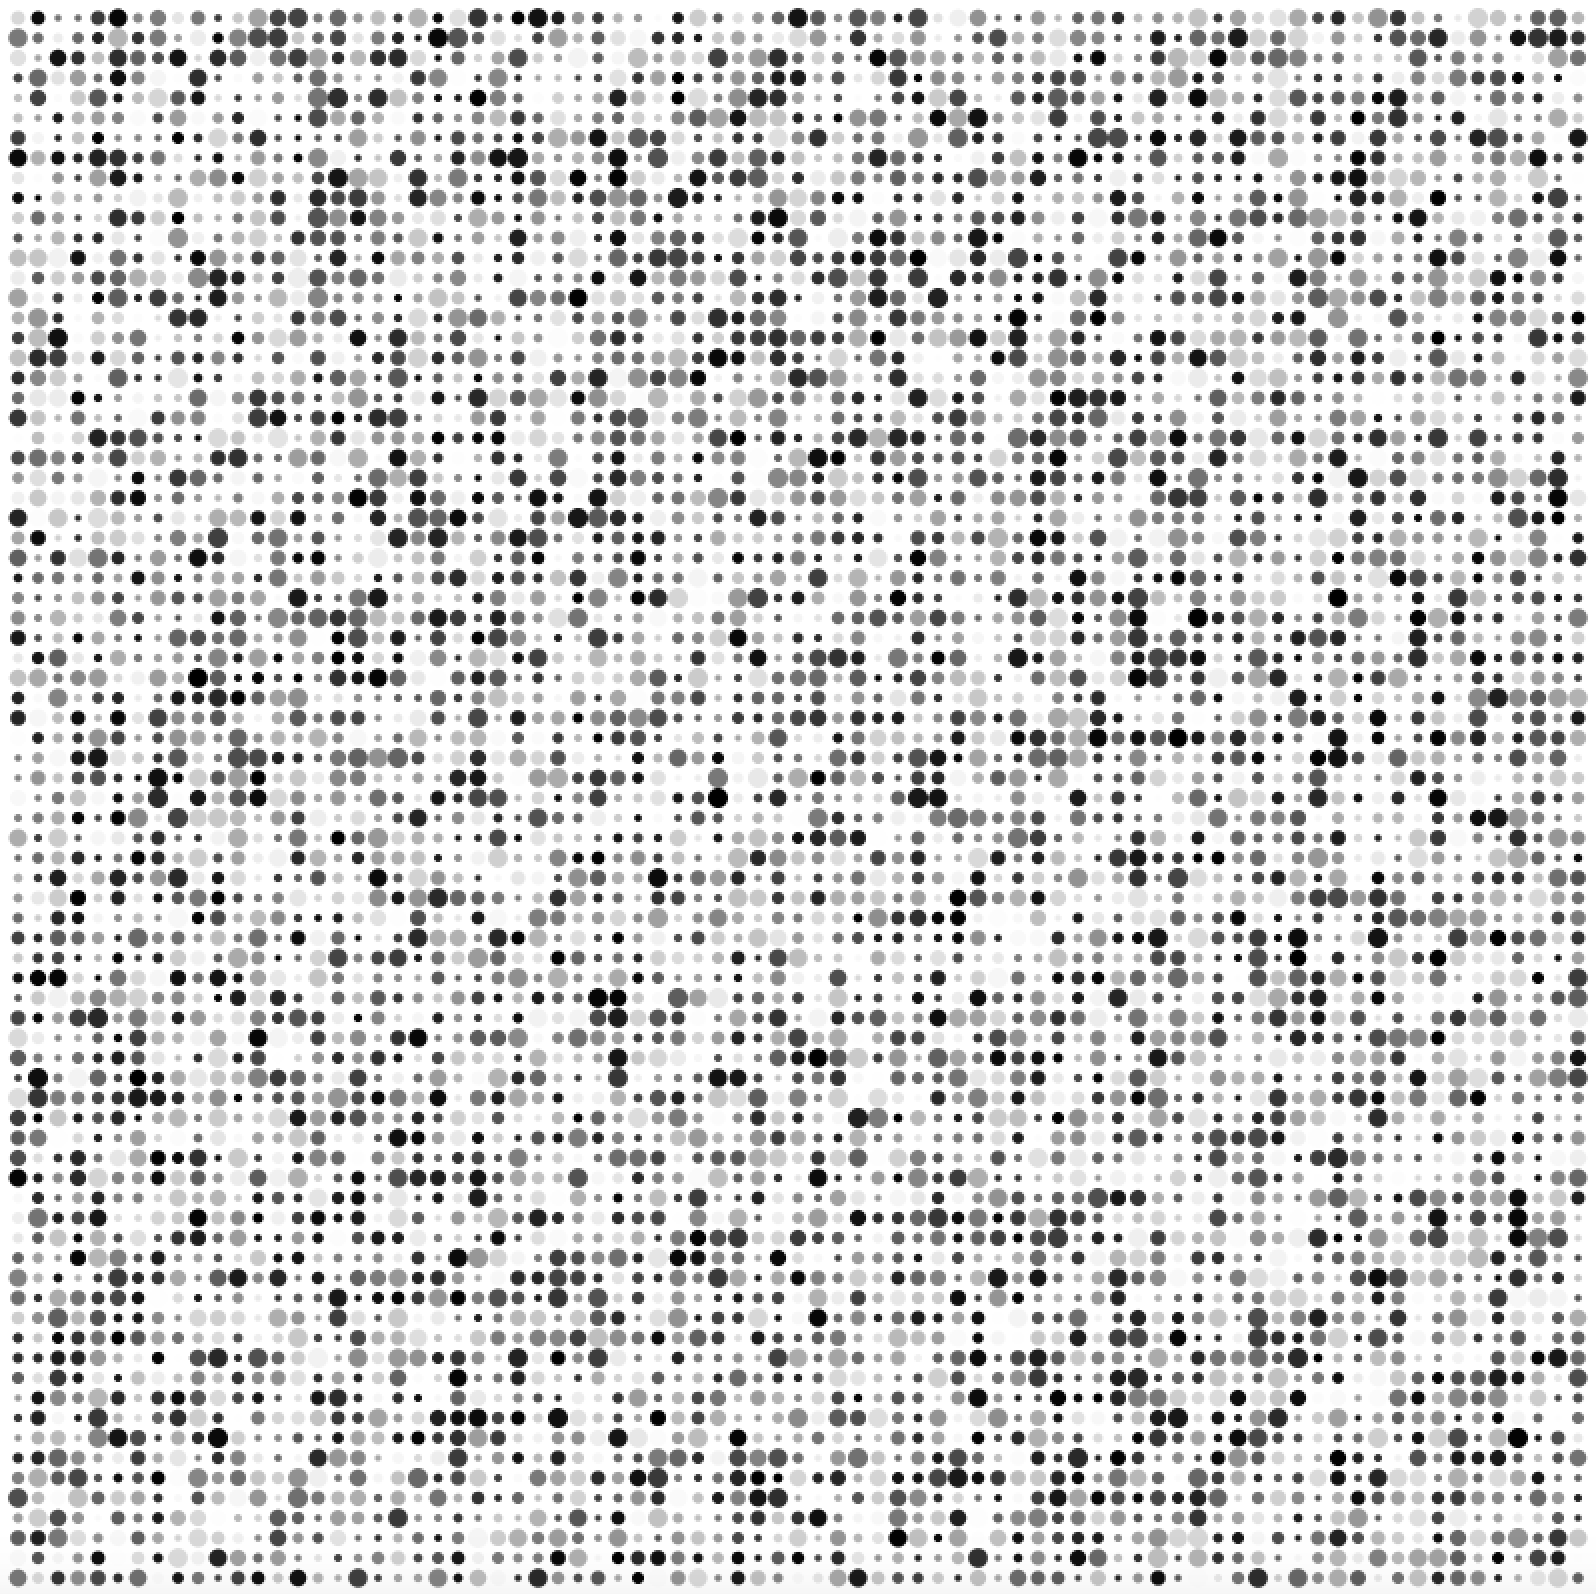
The present script draws a grid of circles in varying sizes and gray-scale values. The number of circles can be controlled by adjusting the ‘gridSize’ variable. ‘noLoop’ will prevent the draw function from running over and over again. Of course in this case the draw function could also be neglected completely, yet for the sake of structuring the sketch it should remain. Turning ‘noLoop’ off will result in a flickering screen. Within the draw function two nested loops iterate in steps defined by ‘gridSize’ through the screen and draw circles at the respective locations.
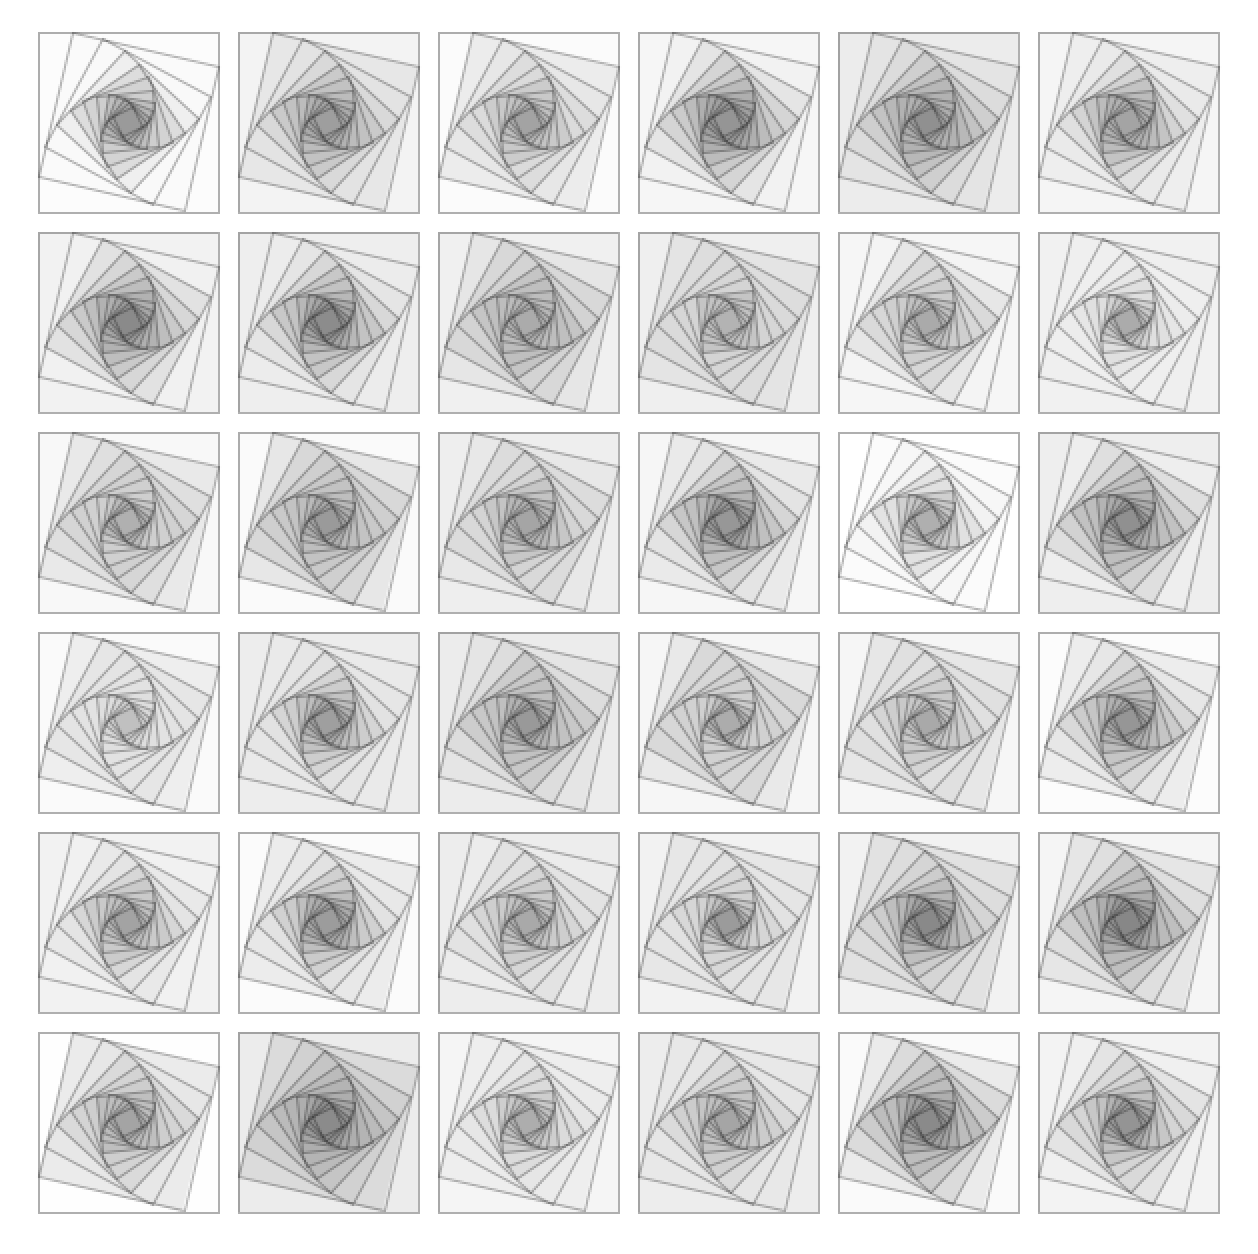
17.2 Square Grid (sketch_04_07)
Similar to the previous script ‘Circle Grid’ this program draws a grid of shapes on the screen, this time a set of nested squares. The sketch uses the ‘pushMatrix()’ function (https://processing.org/reference/pushMatrix_.html) to move the origin to the respective grid locations. It then draws a number of squares which are rotated and scaled inside each other according to the formula s = L / (sin α + cos α), for an enclosing square’s side length of L and an angle of rotation α between 0 and π/2 radians.
int gridSize = 10; // define the size of the grid
void setup() {
size(800, 800); // image size in pixels
background(255); // set background color to white
noStroke(); // no stroke for shapes
noLoop(); // prevent script from looping
}
void draw () {
for (int x = gridSize; x < width; x += gridSize) { // first loop in x-direction
for (int y = gridSize; y < height; y += gridSize) { // second loop in y-direction
float circleSize = random(gridSize*0.3, gridSize); // set random circle size
fill(random(255)); // set random gray value
ellipse(x, y, circleSize, circleSize); // draw circle at each x,y position
}
}
}
int gridSize = 100;
int iterations = 12; // number of times loop runs
int rotation = 14; // rotation in degree
void setup() {
size(600, 600);
background(255);
stroke(0, 80); // set stroke transparency to 80%
rectMode(CENTER); // set rect drawmode to center
noLoop();
}
void draw() {
for (int x = gridSize/2; x < width; x+=gridSize) {
for (int y = gridSize/2; y < height; y+=gridSize) {
float rectSize = gridSize-10; // set rect size 10px smaller than grid
pushMatrix();
translate(x, y);
for (int i = 0; i < iterations; i++) {
fill (0,random(20));
rect(0, 0, rectSize, rectSize);
rectSize = rectSize / (sin(radians(rotation)) + cos(radians(rotation)));
rotate(radians(rotation));
}
popMatrix();
}
}
}
17.3 Birds Nest (sketch_04_08)
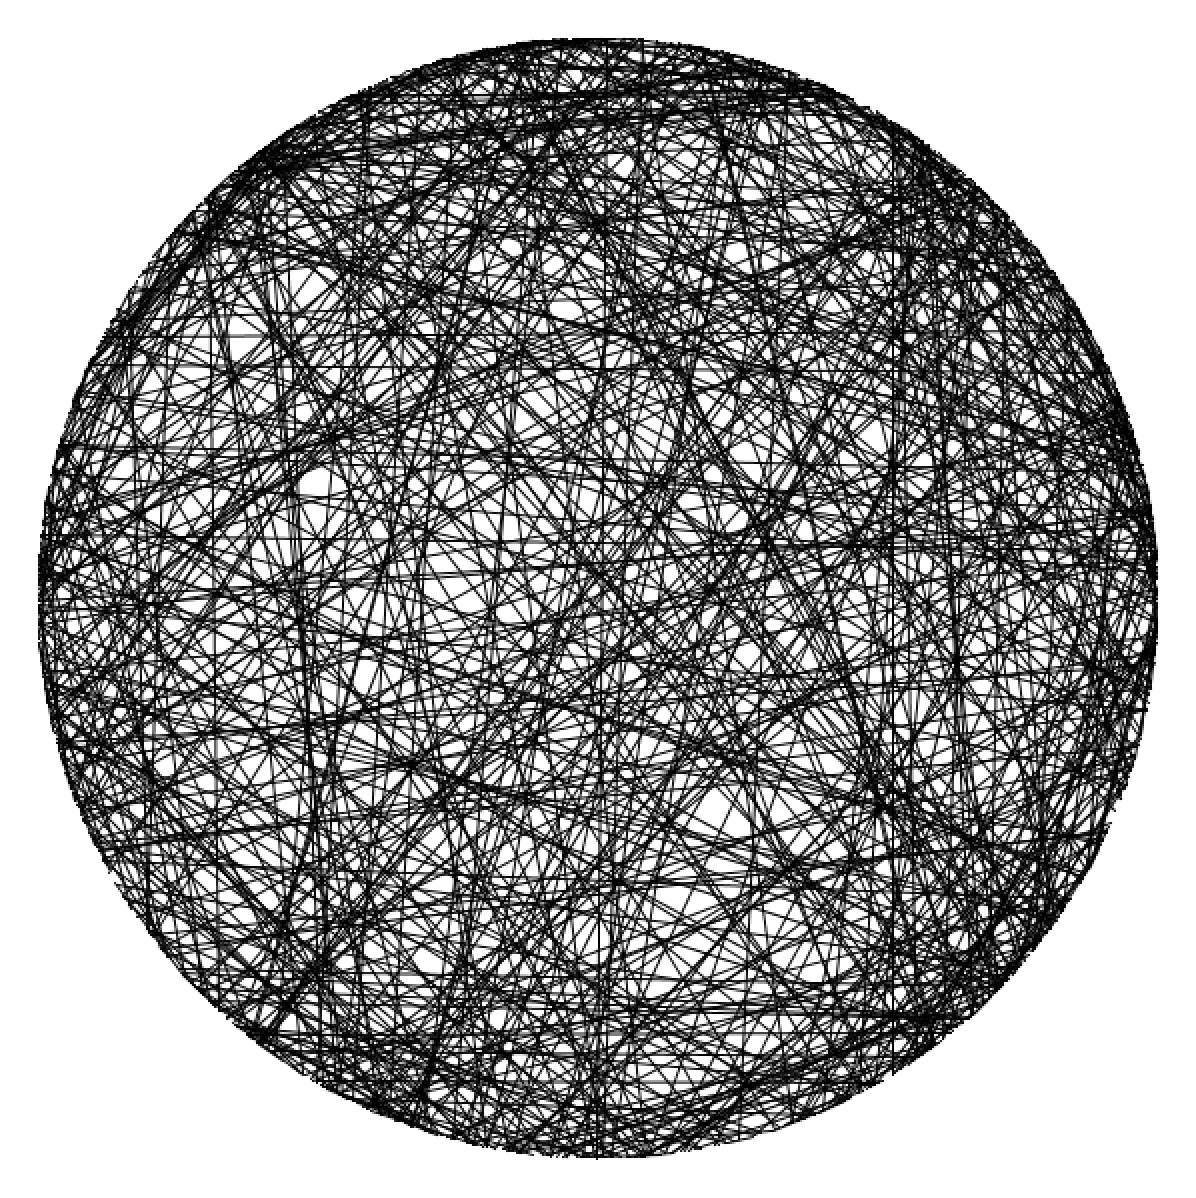
This script draws lines between random locations on a circle. The amount of lines are defined in the global variable ‘num’. The start and end position of each line are generated randomly within the ‘for loop’.
17.4 Network (sketch_04_09)
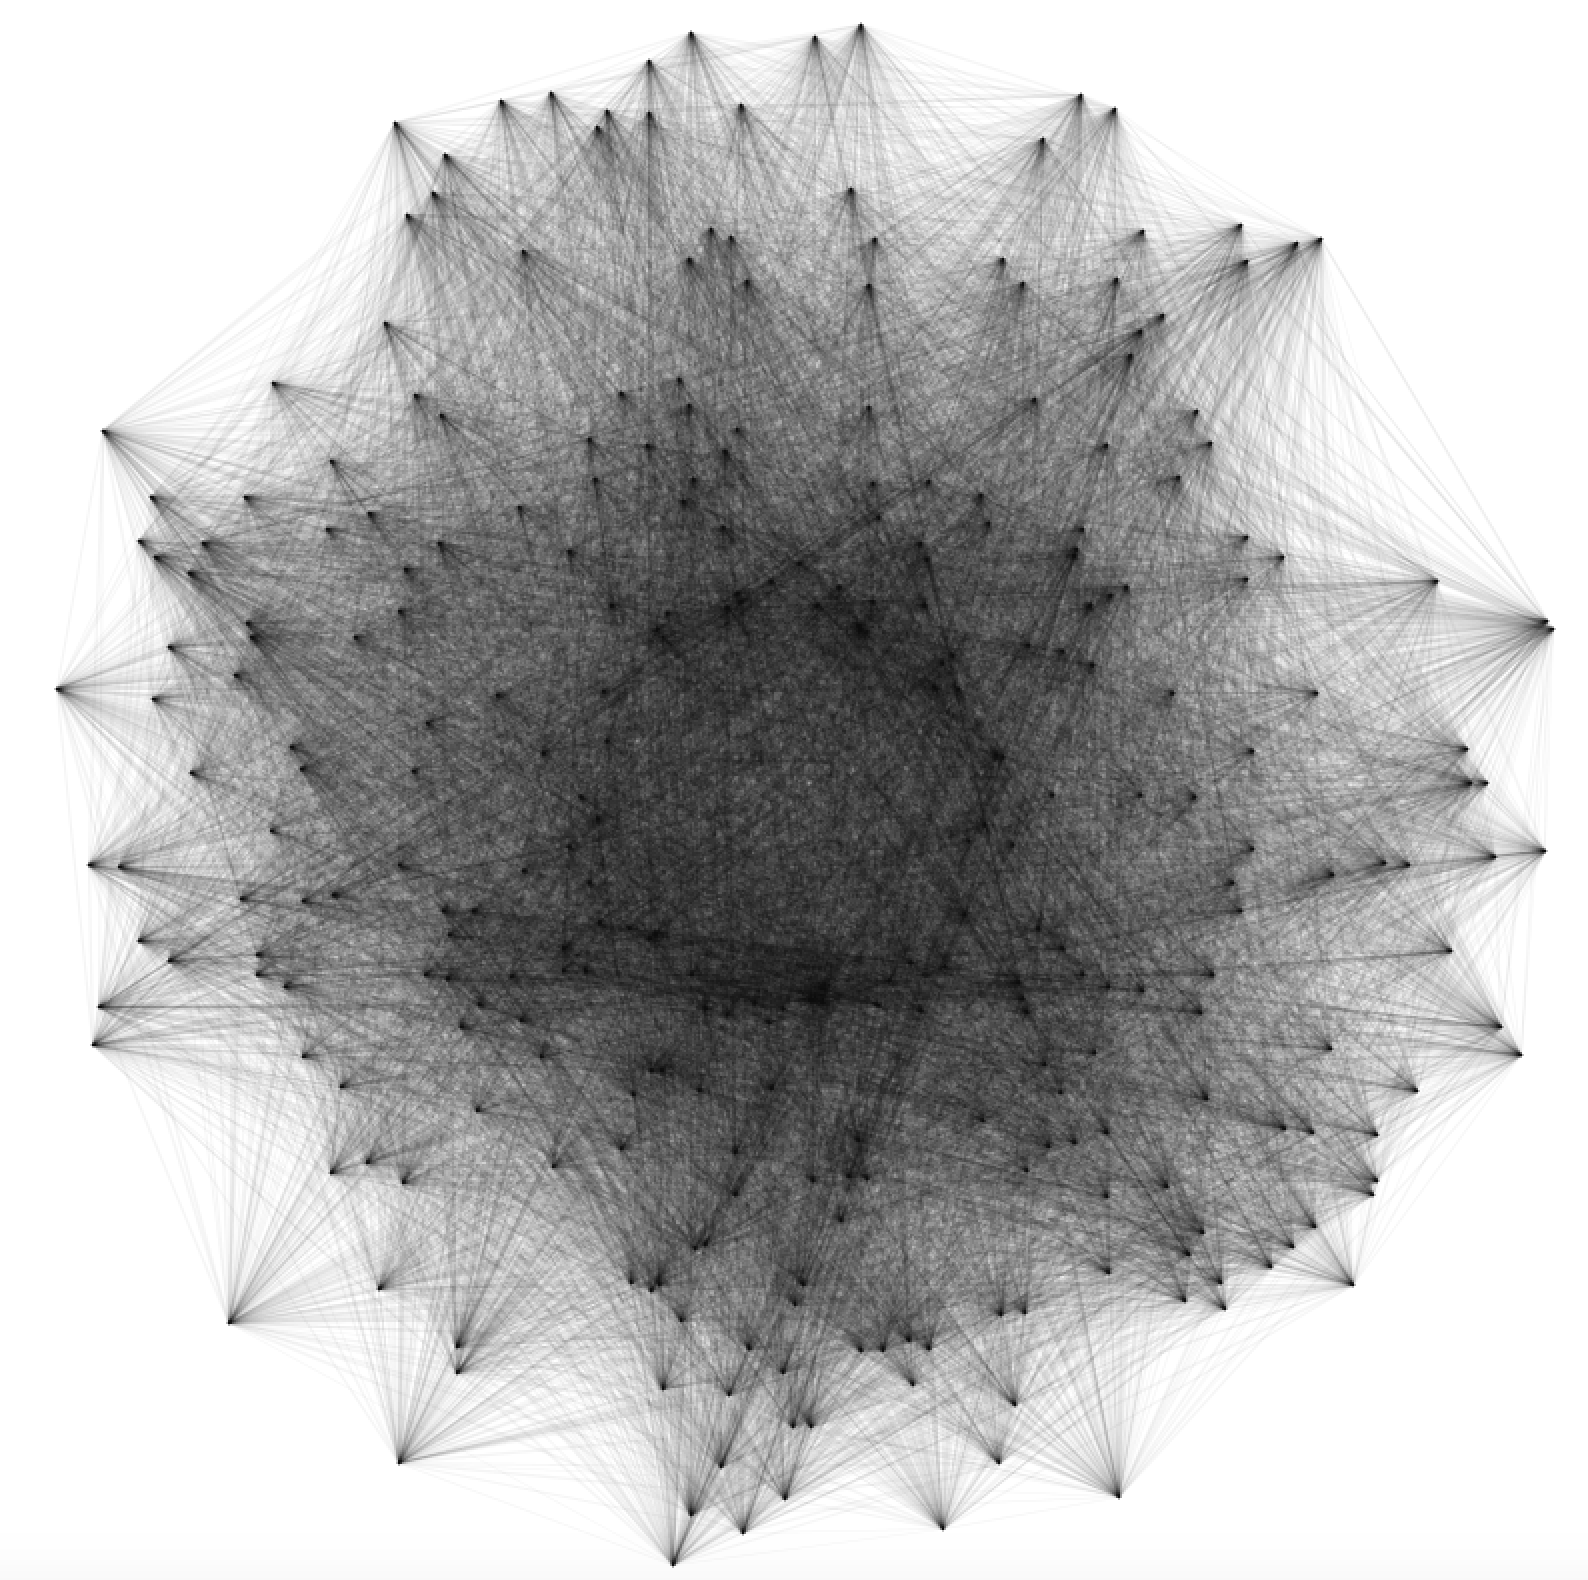
This sketch is similar to the previous one, ‘Birds Nest’. However instead of drawing single lines between two points at random locations on a circle it draws lines between all points within a range of circles, hence creating a network structure. To achieve this we need to create arrays of positions to be able to connect each point with all the others.
int num = 800; // amount of lines to be drawn
void setup() {
size(900, 900);
background(255);
strokeWeight(1);
noLoop();
}
void draw() {
float radius = width/2-20; // set radius of circle
translate(width/2, height/2); // move the origin to the center
for (int i = 0; i < num; i++) {
float angle1 = random(0, TWO_PI); // set random number between 0 and 360
float x1 = sin(angle1) * radius; // first point on circle
float y1 = cos(angle1) * radius;
float angle2 = random(0, TWO_PI);
float x2 = sin(angle2) * radius; // second point on circle
float y2 = cos(angle2) * radius;
line(x1, y1, x2, y2); // line between first and second point
}
}
int num = 150; // amount of nodes in the network
void setup() {
size (800, 800);
background(255);
stroke(0, 10); // setting transparency to 10
noLoop();
}
void draw() {
translate(width/2, height/2); // move origin to screen center
float[] angle1 = new float[num]; // these are arrays of numbers.
float[] angle2 = new float[num]; // the amount is defined by num
float[] x1 = new float[num]; // more info: https://processing.org/reference/Array.html
float[] x2 = new float[num];
float[] y1 = new float[num];
float[] y2 = new float[num];
for (int i = 0; i < num; i++) {
float radius = random(88, width/2-10);
angle1[i] = random(0, TWO_PI);
x1[i] = sin(angle1[i]) * radius;
y1[i] = cos(angle1[i]) * radius;
angle2[i] = random(0, TWO_PI);
x2[i] = sin(angle2[i]) * radius;
y2[i] = cos(angle2[i]) * radius;
}
for (int i = 0; i < num; i++) {
for (int a = 1; a < num; a++) {
strokeWeight(random(0.5, 1.5));
line(x1[i], y1[i], x2[a], y2[a]);
}
}
}
18. Arrays
An array is a list of variables that share a common name. Arrays are useful because they make it possible to work with more variables without creating a new name for each. Each item in an array is called an element, and each has an index value to mark its position within the array, starting from 0. To make an array, start with the name of the data type, followed by the brackets. The name you select for the array is next, followed by the equal symbol, followed by the ‘new’ keyword, followed by the name of the data type again, with the number of elements to create within the brackets. This pattern works for arrays of all data types. A list of five items, all of type int would look like this:
int[] numberArray = new int[5];
You can specify what those five items are when you define the array using the braces syntax:
int[] numberArray = {1, 2, 3, 4, 5};
However you define it, you can add items to each position. The following places a 3 as the third item, not the second. The first position is index 0, so the third item is index 2:
numberArray[2] = 3;
19. Examples Part 2
‘Wiggle Lines’ draws lines between coordinates which randomly vary in their y values. The resolution of the zigzag lines is defined by the ‘xstep’ variable. The spacing of lines is defined by the ‘ystep’ variable. Instead of using the random function this script introduces Perlin noise, which is a random sequence generator producing a more natural, harmonic succession of numbers than that of the standard random() function. In contrast to the random() function, Perlin noise is defined in an infinite n-dimensional space, in which each pair of coordinates corresponds to a fixed semi-random value (fixed only for the lifespan of the program). The resulting value will always be between 0.0 and 1.0. The actual noise structure is similar to that of an audio signal, which is why the resulting zigzag lines remind of frequency or heartbeat diagrams.
‘Noise Spiral’ is similar to ‘Wiggle Lines’ but draws the graph in a circular way, spiraling towards the center of the canvas.
int border = 10; // frame around image
int xstep = 2; // stepsize (resolution) in x direction
int ystep = border; // rows
float lastx;
float lasty;
void setup() {
size(800, 800);
background(255);
strokeWeight(1);
stroke(0); // stroke color black
noLoop();
noFill();
}
void draw() {
for (int i = ystep/2; i <= height-(border+ystep/2); i+=ystep) {
for (int x = border; x <= width-border; x +=xstep) {
float y = noise(random(border, border+ystep))*15; // random noise
if (x == border) {
lastx= 0;
}
if (lastx > 0) {
line(x, y+i, lastx, lasty+i);
}
lastx = x;
lasty = y;
}
}
}
int border = 20; // image frame
int rotations = 100; // amount of spiral rotations
void setup() {
size(800, 800);
background(255);
strokeWeight(1);
stroke(0, 70);
noLoop();
}
void draw() {
float radius = width/2 – border;
int centX = width/2; // center of canvas
int centY = height/2;
float x, y;
float lastx = 0;
float lasty = 0;
float radiusNoise = random(10);
for (float ang = 0; ang <= 360*rotations; ang += 0.5) {
radiusNoise += 0.5;
radius -= 0.005;
float thisRadius = radius – (noise(radiusNoise) * 10);
float rad = radians(ang);
x = centX + (thisRadius * cos(rad));
y = centY + (thisRadius * sin(rad));
if (lastx > 0) {
line(x, y, lastx, lasty);
}
lastx = x;
lasty = y;
}
}
19.3 Polygon Scribble (sketch_04_12)
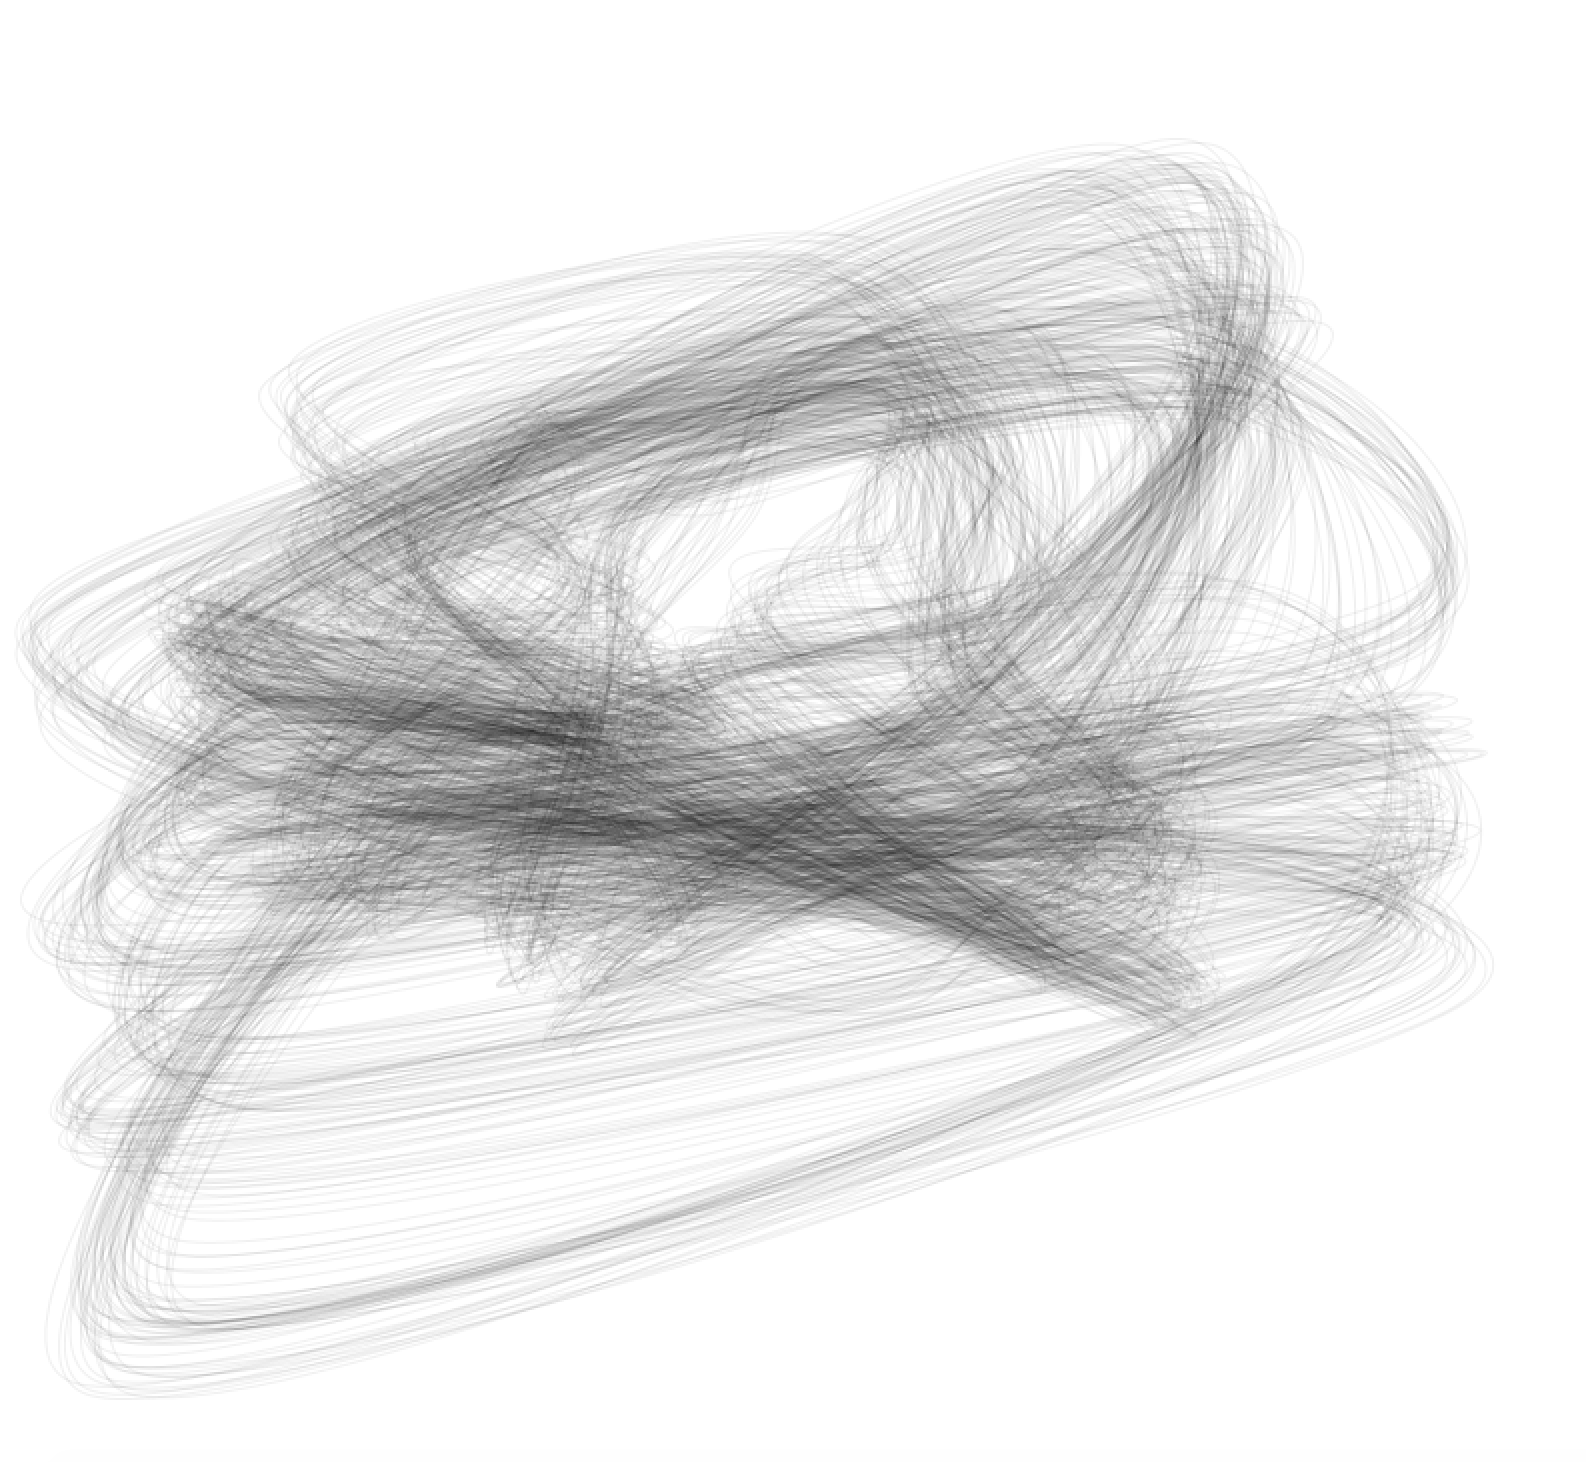
‘Polygon Scribble’ draws random polygon shapes on the screen. For each iteration the position of the polygon coordinates vary slightly, which results in dynamic scribbles. The polygons are drawn using beginShape() (https://processing.org/reference/beginShape_.html) and endShape() (https://processing.org/reference/endShape_.html). Embedded are curveVertex() (https://processing.org/reference/curveVertex_.html) functions, which draw spline curves between the assigned coordinates. The splines are closed by adding the first two coordinates [0] and [1] to the loop.
int sides = 4; // number of polygon sides
float[] x = new float[sides];
float[] y = new float[sides];
float variance = 10; // strength of polygon variation
int iterations = 100; // amount of times program runs
int radius = 150; // initial radius
void setup() {
size(800, 800);
float angle = radians(360/float(sides));
for (int i=0; i < sides; i++) { // coordinates of polygon
x[i] = cos(angle*i+50) * radius;
y[i] = sin(angle*i+50) * radius;
}
stroke(0,15);
strokeWeight(1);
background(255);
noFill();
noLoop();
}
void draw() {
for (int a=0; a < iterations; a++) { // array of polygon coordinates
for (int i=0; i < sides; i++) {
x[i] += random(-variance, variance);
y[i] += random(-variance, variance);
}
beginShape(); // draw polygon shape
curveVertex(x[sides-1]+width/2, y[sides-1]+height/2);
for (int i=0; i < sides; i++) {
curveVertex(x[i]+width/2, y[i]+height/2);
}
curveVertex(x[0]+width/2, y[0]+height/2);
curveVertex(x[1]+width/2, y[1]+height/2);
endShape();
}
}
20. Export
Processing includes a number of ways on exporting the created content. Images can be saved using the saveFrame() function (https://processing.org/reference/saveFrame_.html). If saveFrame() is used without parameters, it will save files as screen-0000.tif, screen-0001.tif, and so on. You can specify the name of the sequence with the filename parameter, including hash marks (####), which will be replaced by the current frameCount value. (The number of hash marks is used to determine how many digits to include in the file names.) Append a file extension, to indicate the file format to be used: either TIFF (.tif), TARGA (.tga), JPEG (.jpg), or PNG (.png). Image files are saved to the sketch’s folder, which may be opened by selecting “Show Sketch Folder” from the “Sketch” menu.
Since our scripts due to the noLoop() function often only run once the default way of using saveFrame() would overwrite existing images each time the function is called. We therefore add the current time to the image name. This is done by adding
import java.util.Calendar;
at the beginning of the script and creating two functions at the end:
void keyPressed() {
  if (key == ‘s’ || key == ‘S’) saveFrame(timestamp()+”.png”);
}
String timestamp() {
  Calendar now = Calendar.getInstance();
  return String.format(“%1$ty%1$tm%1$td_%1$tH%1$tM%1$tS”, now);
}
Now, whenever the key ‘s’ is pressed an image named with the current date and time is created.
PDF or SVG vector files can be saved using beginRecord() and endRecord() (https://processing.org/reference/beginRecord_.html). The beginRecord() function requires two parameters, the first is the renderer and the second is the file name. This function is always used with endRecord() to stop the recording process and close the file. Note that beginRecord() will only pick up any settings that happen after it has been called. For instance, if you call textFont() before beginRecord(), then that font will not be set for the file that you’re recording to.
In our case this requires to first add
import processing.pdf.*;
at the top of the script and then include
beginRecord(PDF, timestamp()+”.pdf”);
within the setup() function and
endRecord();
at the end of the draw() function.
The complete ‘Polygon Scribble’ program would then look like this. Note that beginRecord() is in comments since otherwise a PDF would be created each time the script is run.
import processing.pdf.*;
import java.util.Calendar;
int sides = 4;
float[] x = new float[sides];
float[] y = new float[sides];
float variance = 10;
int iterations = 3000;
int radius = 150;
void setup() {
size(800, 800);
// beginRecord(PDF, timestamp()+”.pdf”);
smooth();
float angle = radians(360/float(sides));
for (int i=0; i<sides; i++) {
x[i] = cos(angle*i+50) * radius;
y[i] = sin(angle*i+50) * radius;
}
stroke(0,5);
strokeWeight(1);
background(255);
noFill();
noLoop();
}
void draw() {
background(255);
for (int i=0; i< iterations; i++) {
for (int a=0; a < sides; a++) {
x[a] += random(-variance, variance);
y[a] += random(-variance, variance);
}
beginShape();
curveVertex(x[sides-1]+width/2, y[sides-1]+height/2);
for (int a=0; a < sides; a++) {
curveVertex(x[a]+width/2, y[a]+height/2);
}
curveVertex(x[0]+width/2, y[0]+height/2);
curveVertex(x[1]+width/2, y[1]+height/2);
endShape();
}
endRecord();
}
void keyReleased() {
if (key == ‘s’ || key == ‘S’) saveFrame(timestamp()+”_##.png”);
}
// timestamp
String timestamp() {
Calendar now = Calendar.getInstance();
return String.format(“%1$ty%1$tm%1$td_%1$tH%1$tM%1$tS”, now);
}
Sources:
– “Learning Processing, Second Edition: A Beginner’s Guide to Programming Images, Animation, and Interaction” by Daniel Shiffman (2015)
– “Generative Art” by Matt Pearson (2011)
– “Make: Getting Started with Processing” by Casey Reas and Ben Fry (2010)
– Processing documentation (https://processing.org/tutorials/)
Further Links:
https://processing.org/tutorials/
http://www.generative-gestaltung.de/
http://www.openprocessing.org/
http://hello.processing.org/editor/
http://www.plethora-project.com/education/2011/09/12/processing-tutorials/
http://funprogramming.org
http://processing.internauta.ch/index.html
https://vimeo.com/album/175574
Instructions
Manuel Kretzer
Duration
Several hours
Level
Advanced
Instructions
Manuel Kretzer
Duration
Several hours
Level
Advanced
Instructions
Manuel Kretzer
Duration
Several hours
Level
Advanced
Instructions
Manuel Kretzer
Duration
Several hours
Level
Advanced
Instructions
Manuel Kretzer
Duration
Several hours
Level
Advanced
Instructions
Manuel Kretzer
Duration
Several hours
Level
Advanced
Instructions
Manuel Kretzer
Duration
Several hours
Level
Advanced
Instructions
Manuel Kretzer
Duration
Several hours
Level
Advanced
Instructions
Manuel Kretzer
Duration
Several hours
Level
Advanced


